Sometimes you just have to head up the road to catch the sun rising over the horizon at a favoured castle ruin.
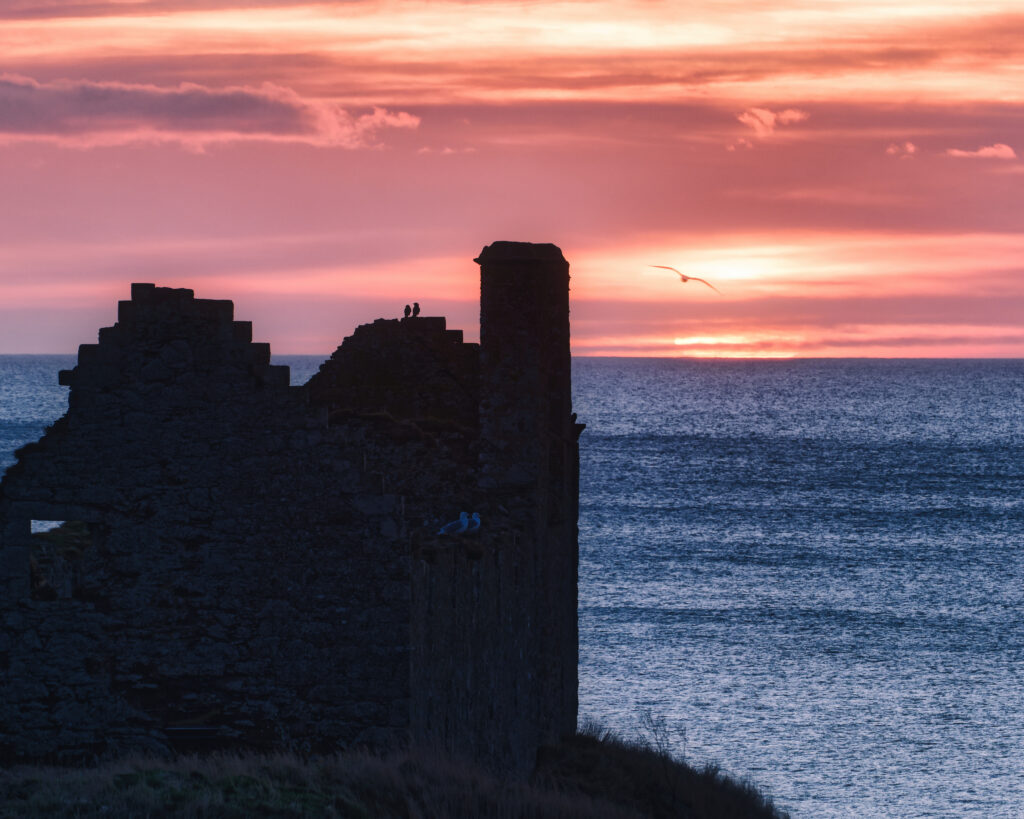
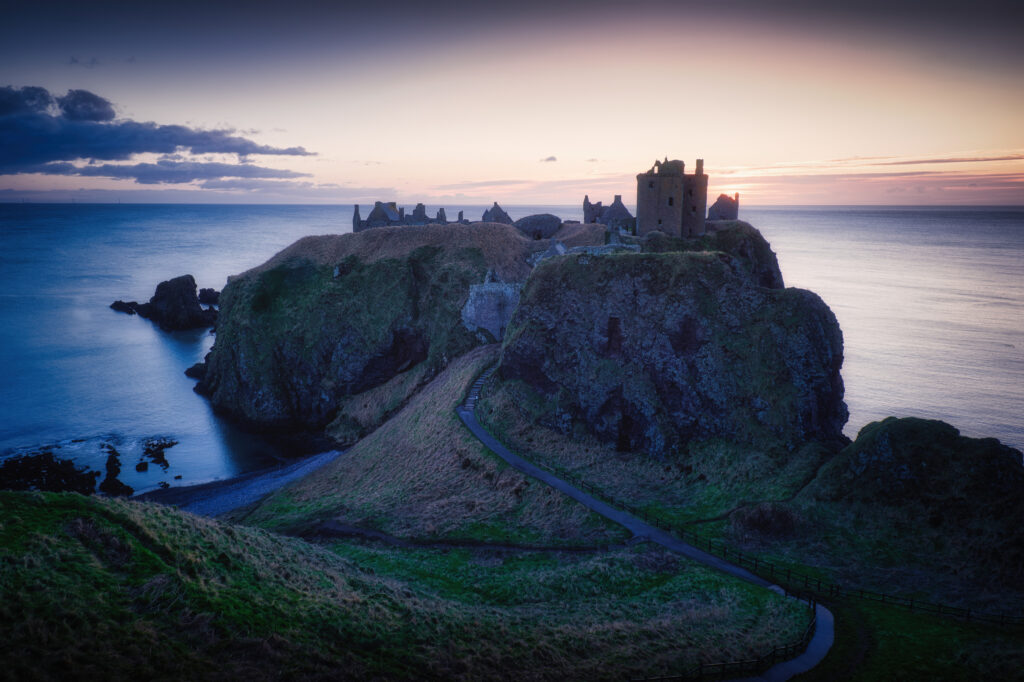
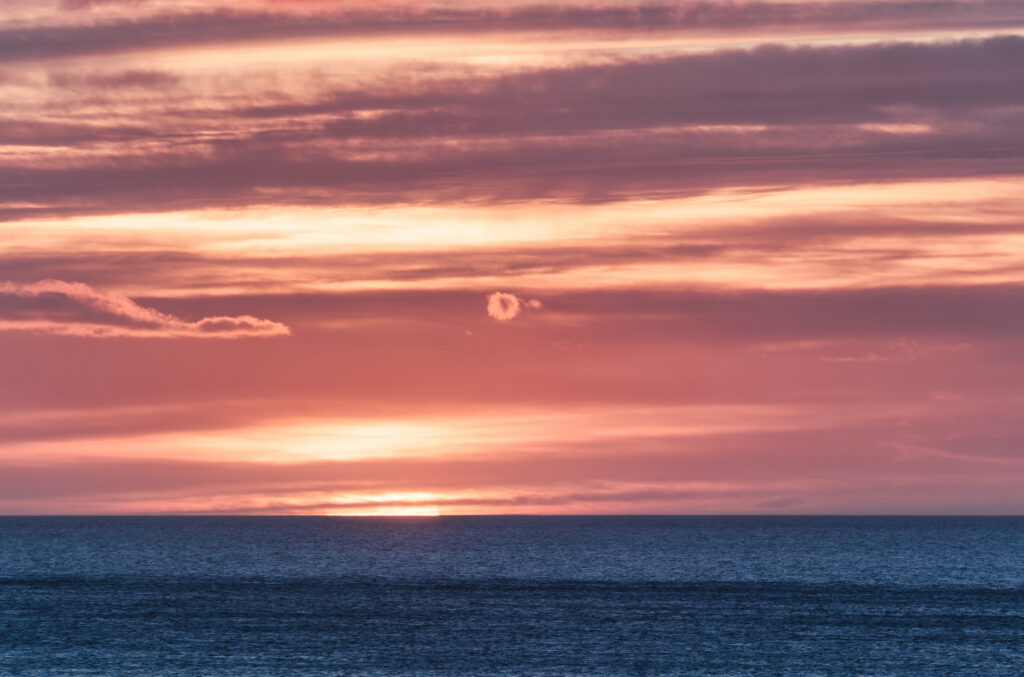
I have photos for sale of Dunnottar Castle over on shiny.photo.
Sometimes you just have to head up the road to catch the sun rising over the horizon at a favoured castle ruin.
I have photos for sale of Dunnottar Castle over on shiny.photo.
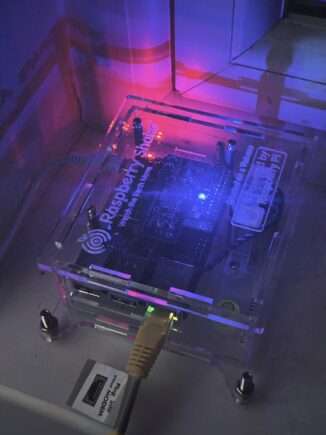
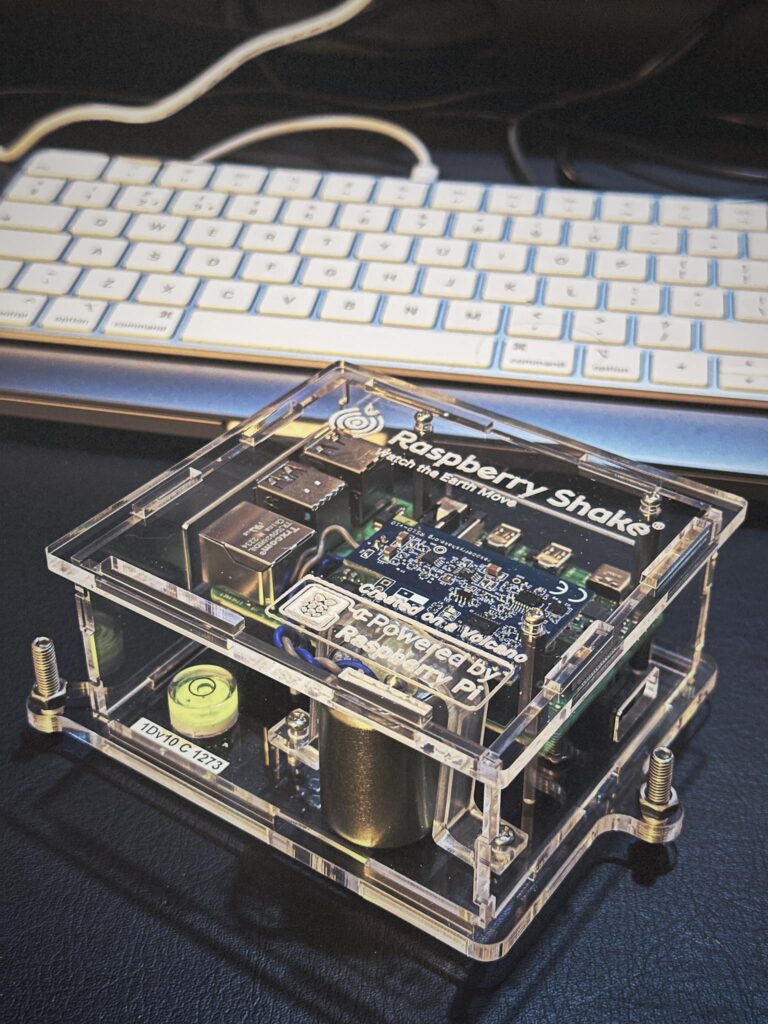
I’ve had my eye on the Raspberry Shake seismometer for a couple of years now. Last week, I finally succumbed and bought both a new Raspberry Pi (just a 4B 2GB RAM – cheap yet more than adequate) and a Shake 1-D.
The 1-D is a simple seismometer, responding only in the up/down direction. Other products are available…
Mine arrived as a kit, that even I was able to stick together in under half an hour (thanks to a youtube video showing what most of the screws and things were for).
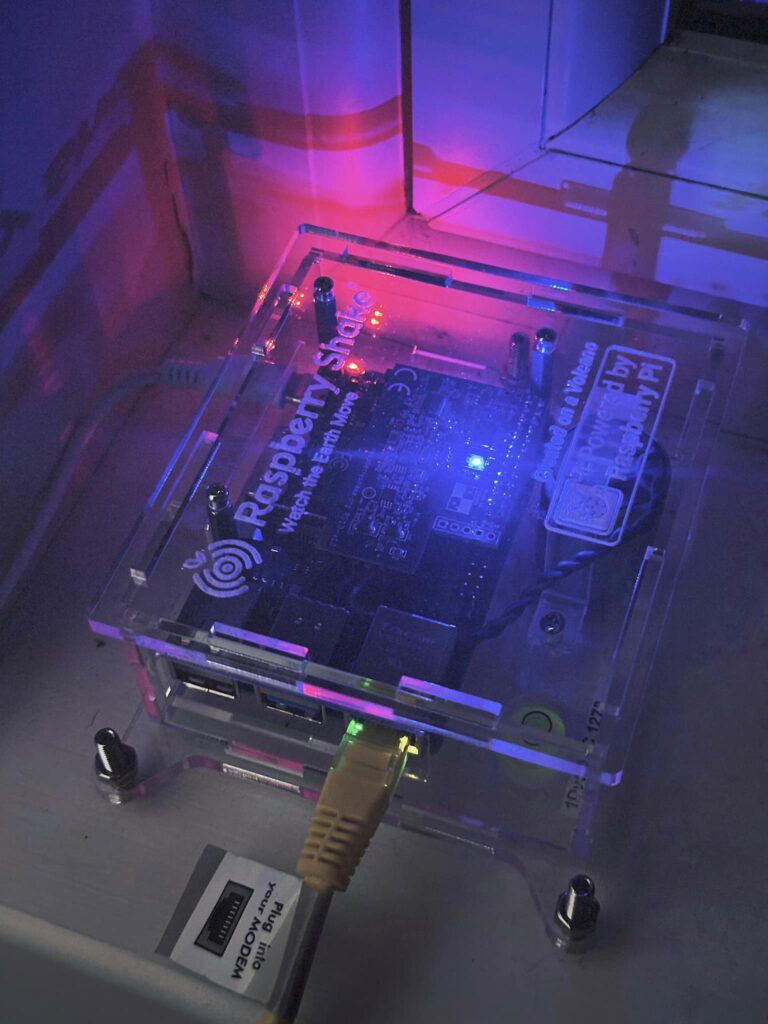
I installed and levelled it on the downstairs windowsill and plugged it directly into the main ADSL router – when you’re uploading a hundred samples per second, minimizing latency is essential.
Obviously, being based in mainland Scotland, I don’t expect to see that many significant earthquakes. We get a handful of ~magnitude 2.5 around the country every couple of years if we’re lucky. However, recently YouTube has sent me down a rabbit-hole of geological analyses of goings-on in Iceland’s Reykjanes peninsula – the recent sequence of volcanic eruptions alternating with tiny earthquakes as the magma chamber refills.
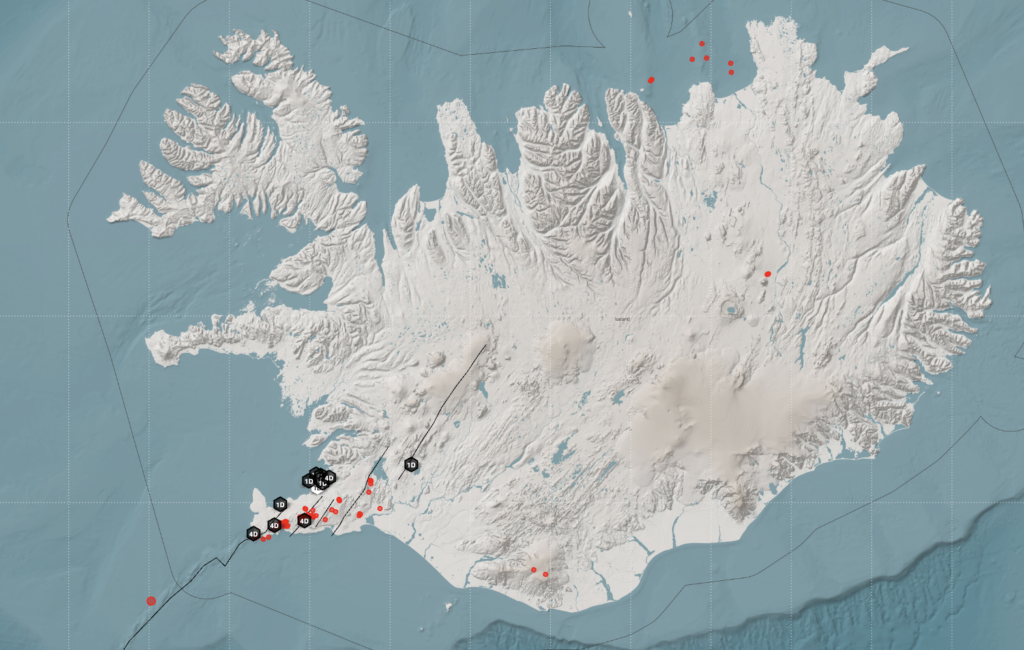
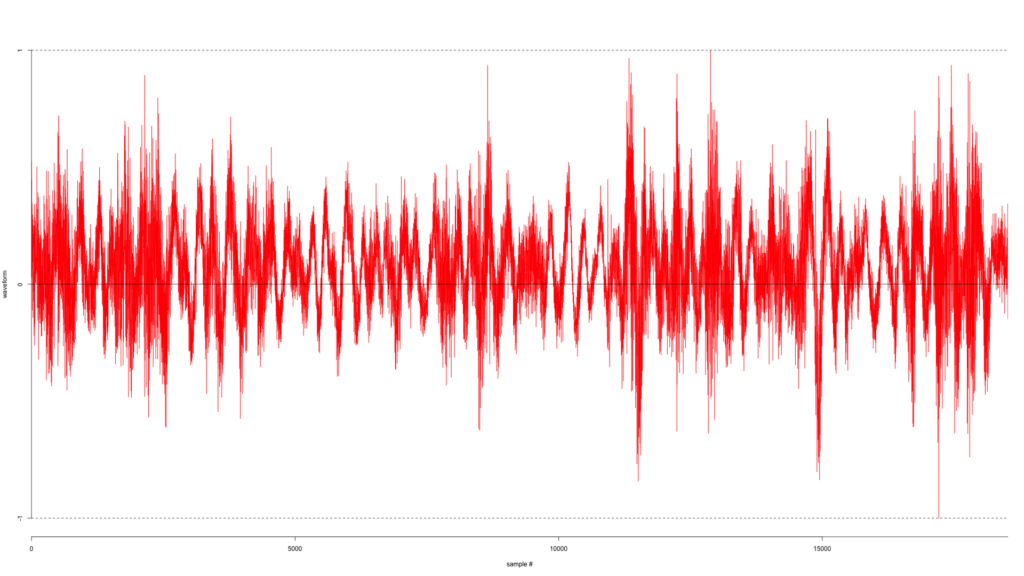
The very first night, I spotted a magnitude 3.6 quake in Iceland.
Since then, the live data stream has sadly been unavailable for about 5 days, but when it works, the ability to select a quake event and then click on a station and see the station’s raw data really rocks.
There was another magnitude 3.7 earthquake along the Mid-Atlantic Ridge offshore a few miles south-west of Grindavik yesterday. The live-data view is currently working in the mobile app, leading to this analysis – showing the P and S waves propagating from the event.
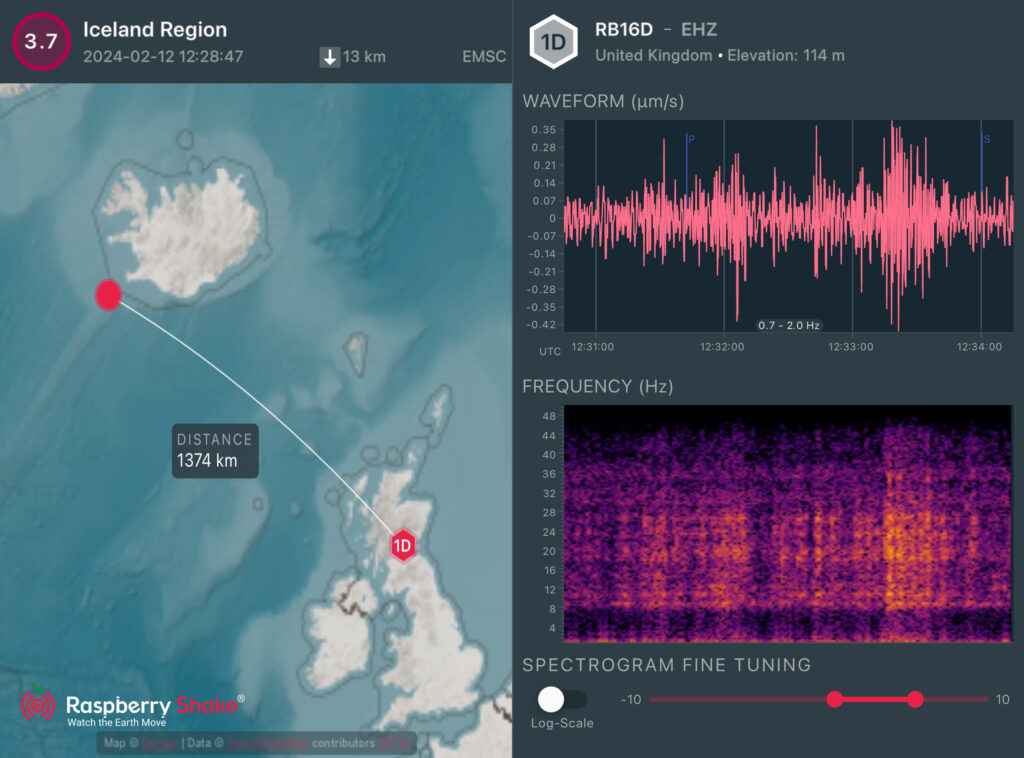
As monitoring equipment goes, I’m impressed. It’s a wonderful device, very sensitive yet easy to set up and works well. I’ll continue to watch for all quakes nearby and larger ones further afield, if only to be able to say “I saw it” 🙂
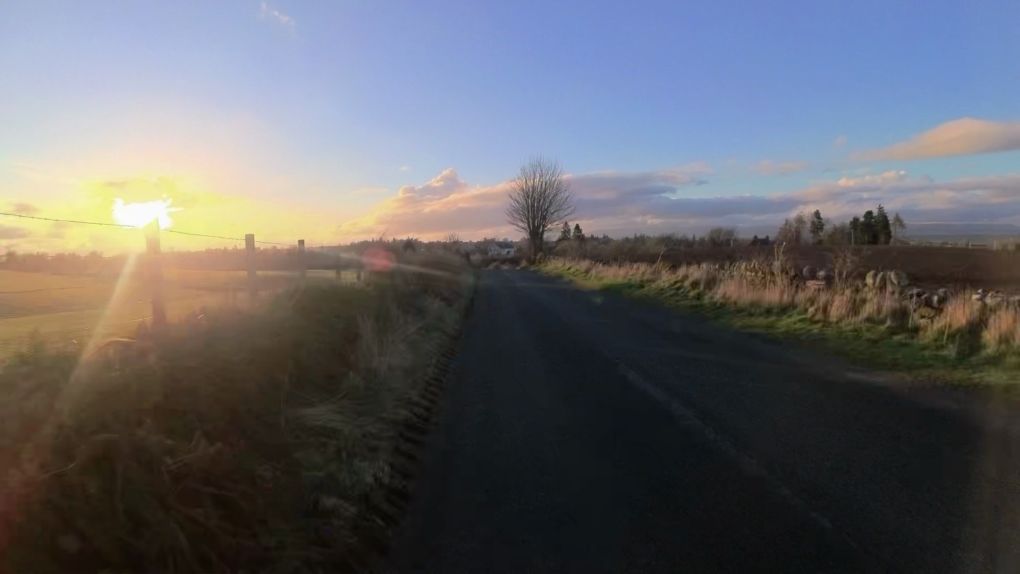
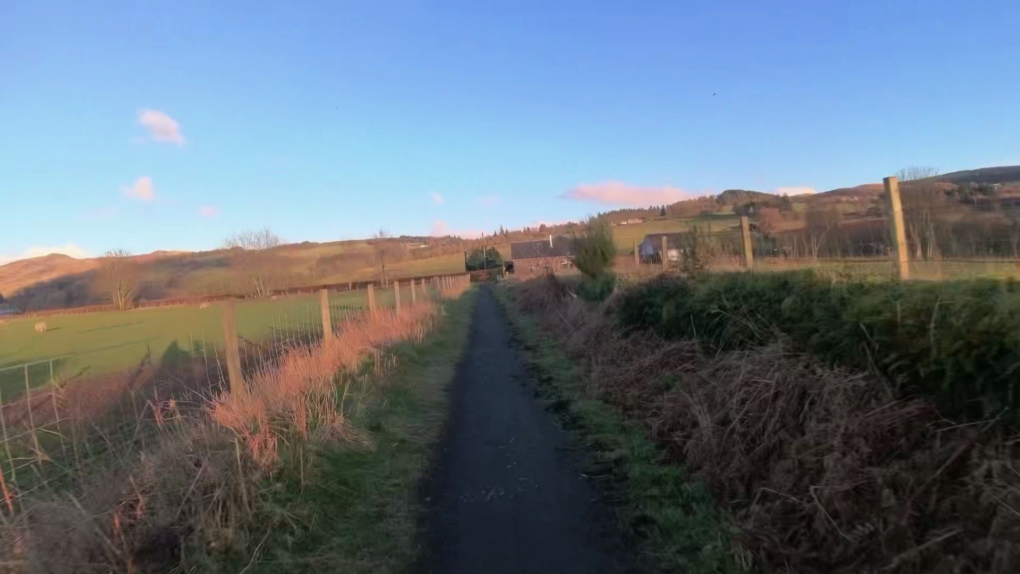
I spent a happy 25mins yesterday evening biking around the outskirts of town at golden hour.
Full video – 25mins compressed down to 5: https://www.youtube.com/watch?v=fF4MYvQ-IDQ
Partly due to the weather, mostly due to recognising foibles and problems in my gear, it’s been ages since I made an astro image worth publishing.
I shot in OSC (one-shot colour) using the QHY 268C camera, using two filters (a Neodymium light-pollution filter and IDAS NBZ dual-narrowband) for a total of over 30 hours’ data over the course of 3 nights in the past fortnight, of which I kept 20.9 hours.
Prints, cards, masks, clocks and other products featuring this image are available via my ShinyPhoto website: vdB14 + vdB15, Camelopardalis.
A full write-up detailing all the data captured and how it was processed can be seen over at my Telescopius page: vdB14 + vdB15, Camelopardalis
This one feels rather good 🙂
Last summer, I thought to upgrade from the Fuji X-T4 to the Canon R5.
It didn’t last long.
I spent ages poring over specs sheets online, checking image quality, etc.
As a geek interested in various forms of nature photography (closeup, landscape and astrophotography), for over a decade I’ve made a habit of shooting more than one RAW per output image. Whether the scene in front of me benefits from simply average-stacking, HDR, focus-stacking, pixel-shift or panorama, the more data captured at source, the better an image can be produced and the more future-proof it is against further revisiting, potentially years down the line.
Given that I do a lot of my photography during weekend hikes around the countryside, in any given day I’m likely switching between these drive modes on a regular basis as I react to what’s in front of me.
This is where the Canon R5 falls down. For all that the specs suggest it might be a “perfect” camera for landscape, in reality it’s anything but. I found are three areas of major fault that nobody in any “review” seems to have noticed:
I got a few good photos out of it, but the above loomed too large, destroyed my enthusiasm for it – big regret.
So I sold it after only a few months.
Fuji brought out the X-H2 while I wasn’t looking and it is far better suited to my taste.
I don’t normally much care for brand allegiance – I’ll shift from Olympus to Pentax to Fuji to Sony to Fuji to Canon to Fuji if I think they suit me best at a given moment (over many years, I might add!) – but I can’t help notice this is now the third time I’ve come round to Fuji… it’s almost a habit.
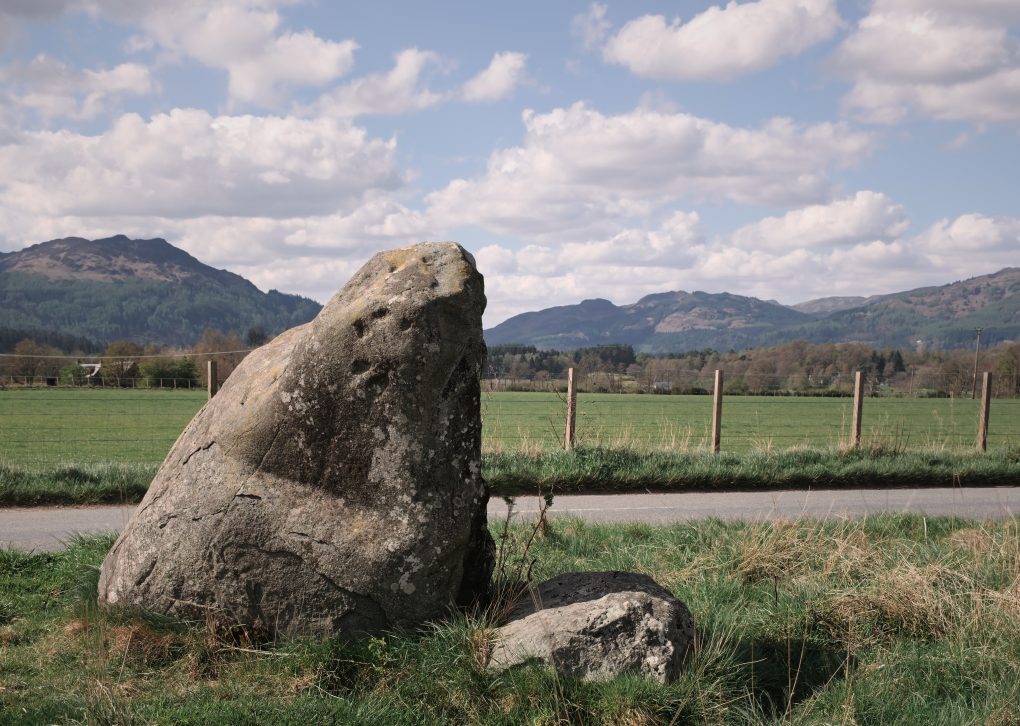
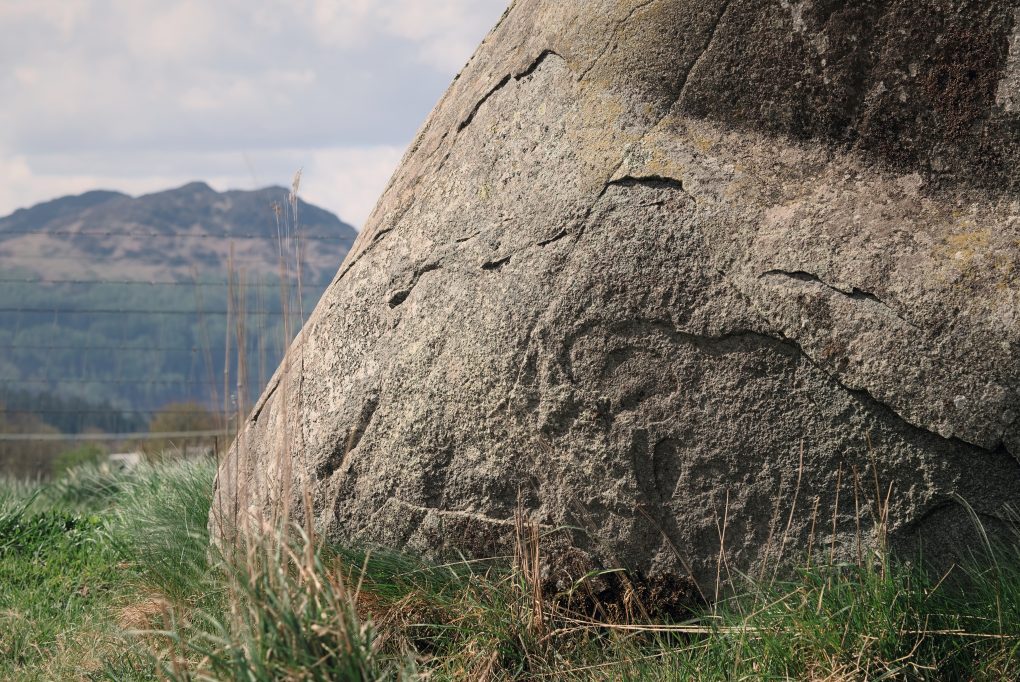
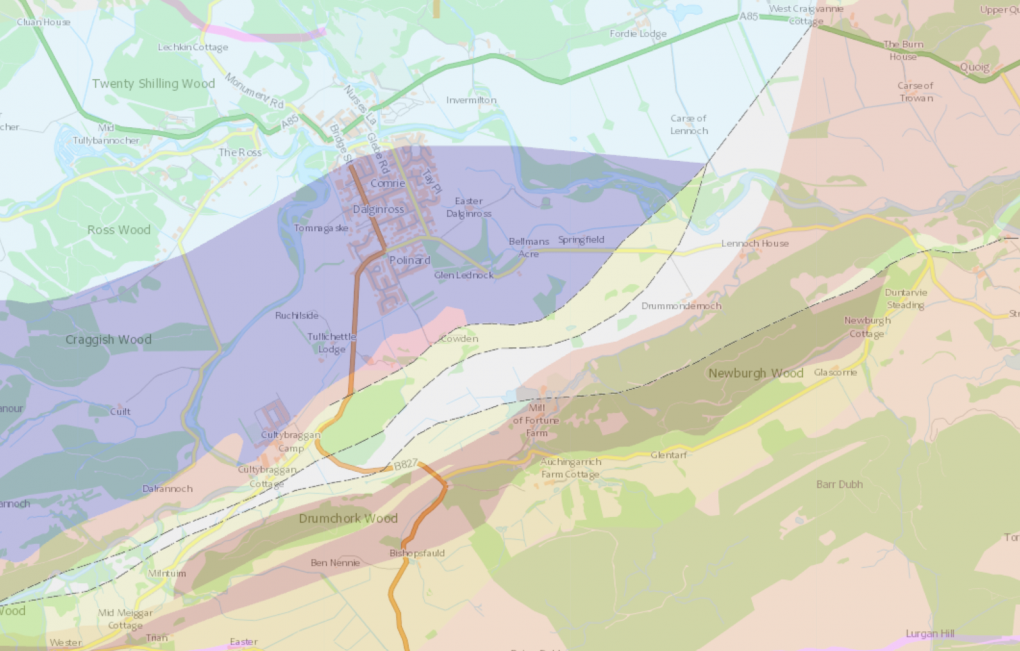
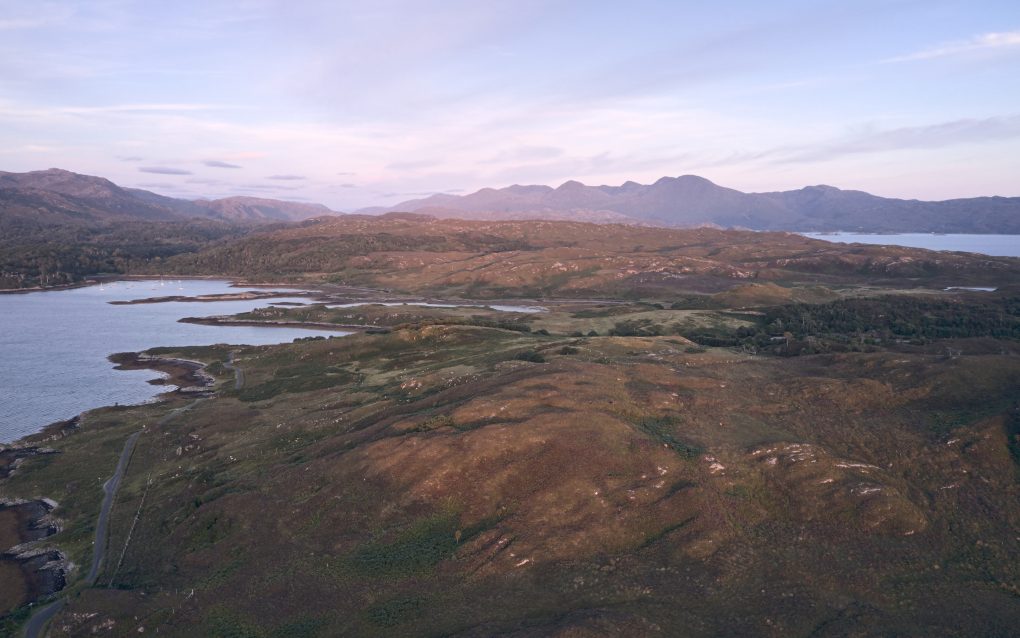
A few years ago I discovered a pleasant gentle walk route around the Water of Ruchill outside Comrie. Almost entirely flat, it follows a loop from the village centre through scrub woodland (ideal shade on a sunny day!) along the side of the river past fields formerly occupied by a Roman fort, down to Cultybraggan PoW camp and back along the main B-road for a bit before taking a detour along a path from a standing stone over fields into the southern end of Dalginross and back along the streets to where it started.
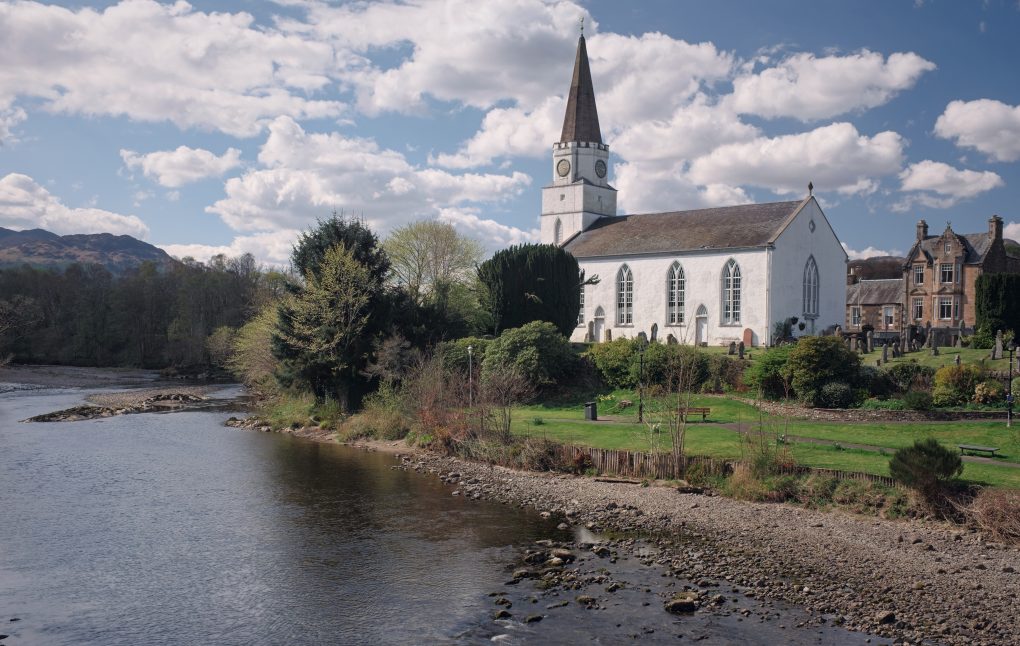
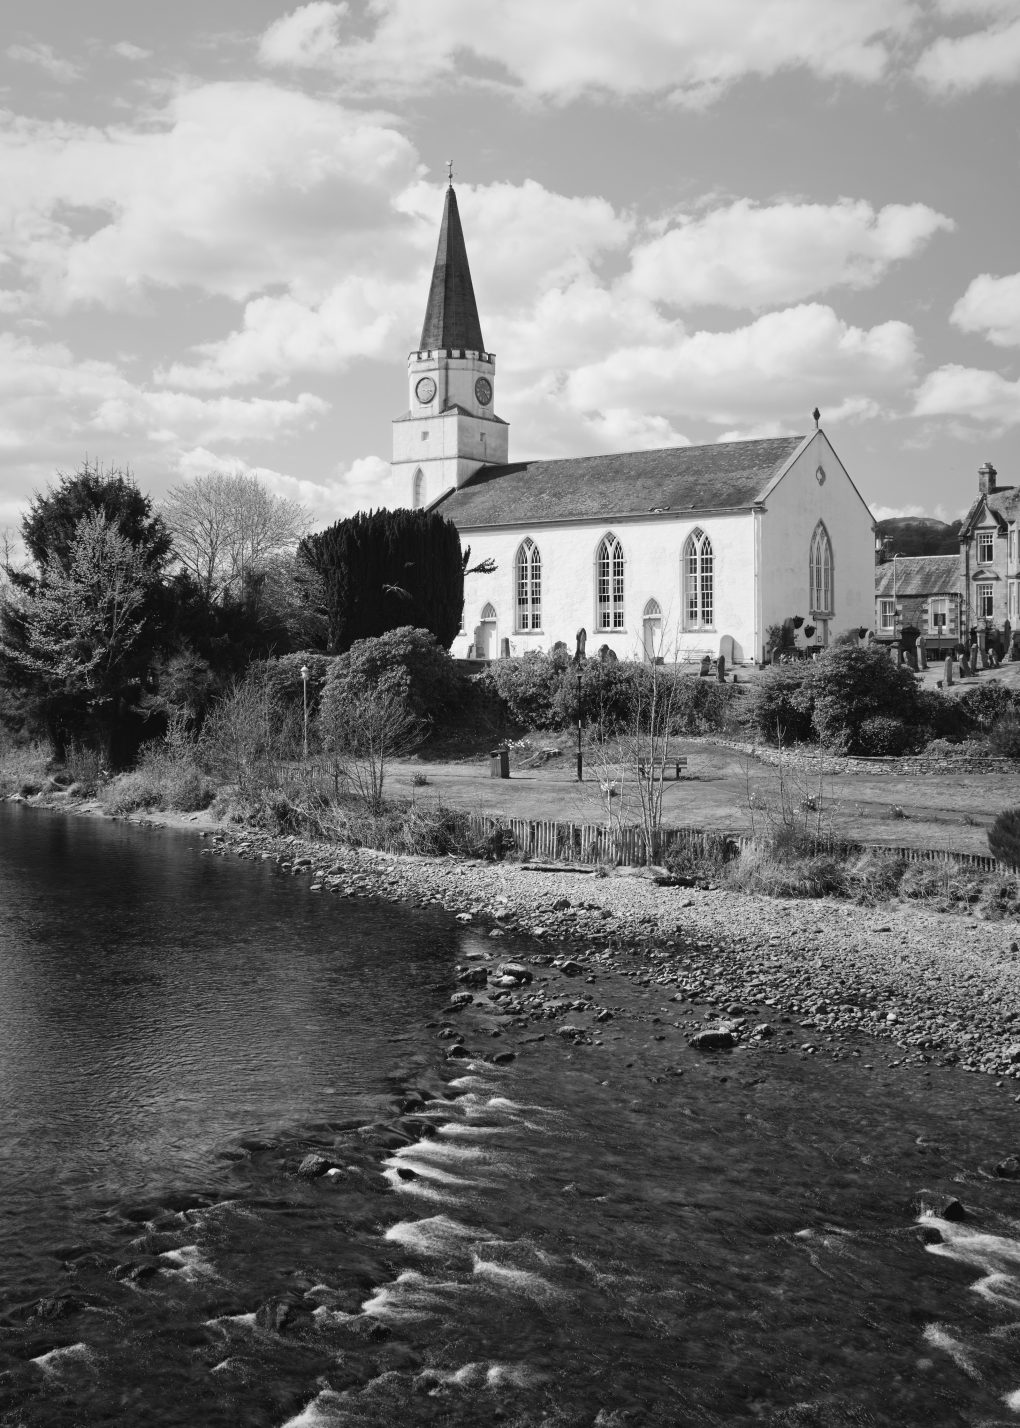
In the town centre, the White Kirk stands out for its architecture with prominent tower and spire. Formerly the parish church, it is now home to a community centre.

Finally, a drone overview of the whole town – to the north, Dalginross, Comrie, Melville’s Monument and Glen Lednock; to the south, the Highland Boundary Fault runs from Glen Artney in the west right along the field across the road from Cultybraggan through Cowden Loch, Mill of Fortune and Newburgh Wood.
A map of the area, courtesy of the BGS Geoindex:
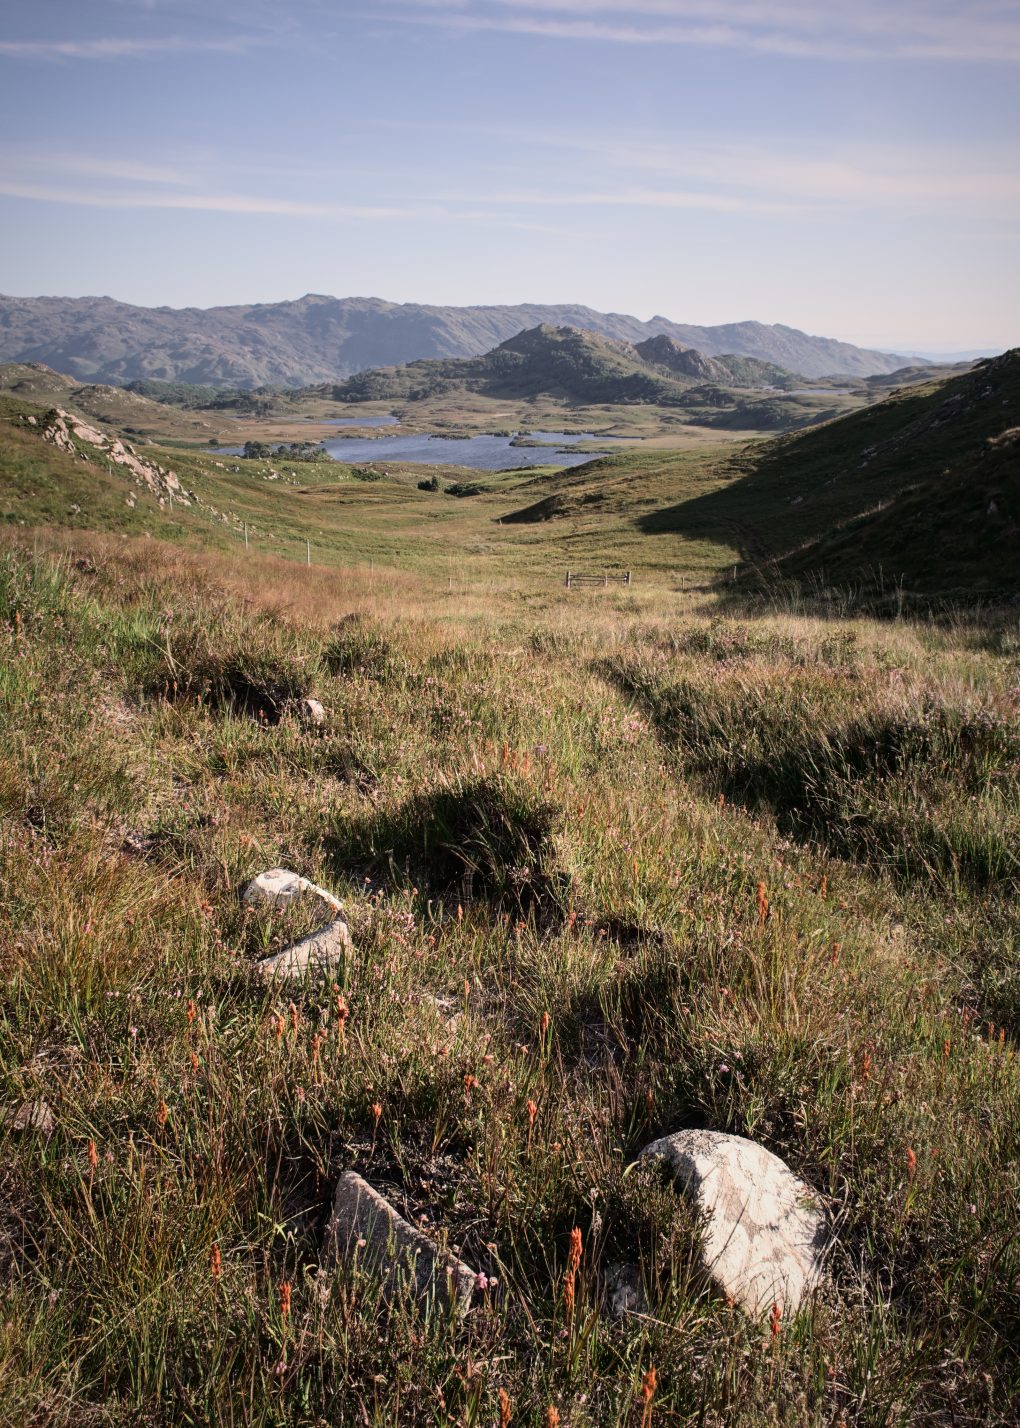
I wouldn’t be the only person to favour Scotland’s west coast – its beautiful landscape, impressive geology.
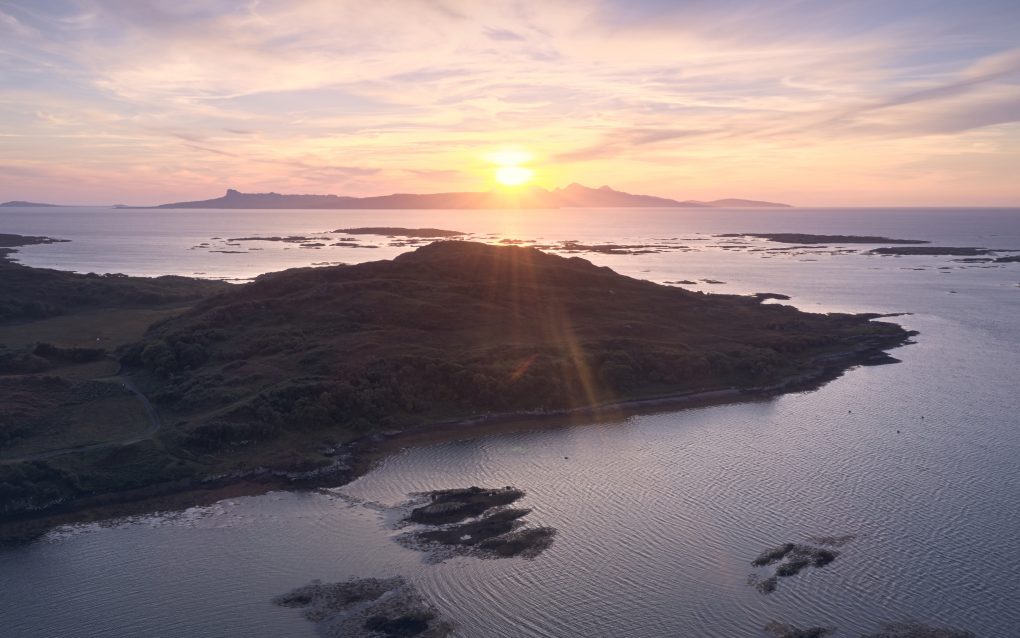
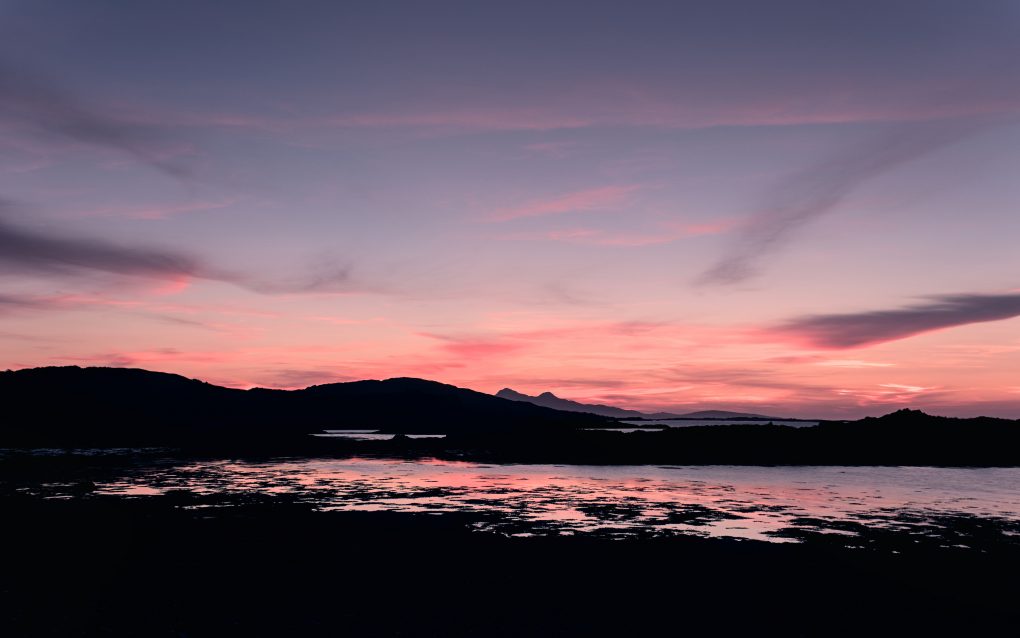
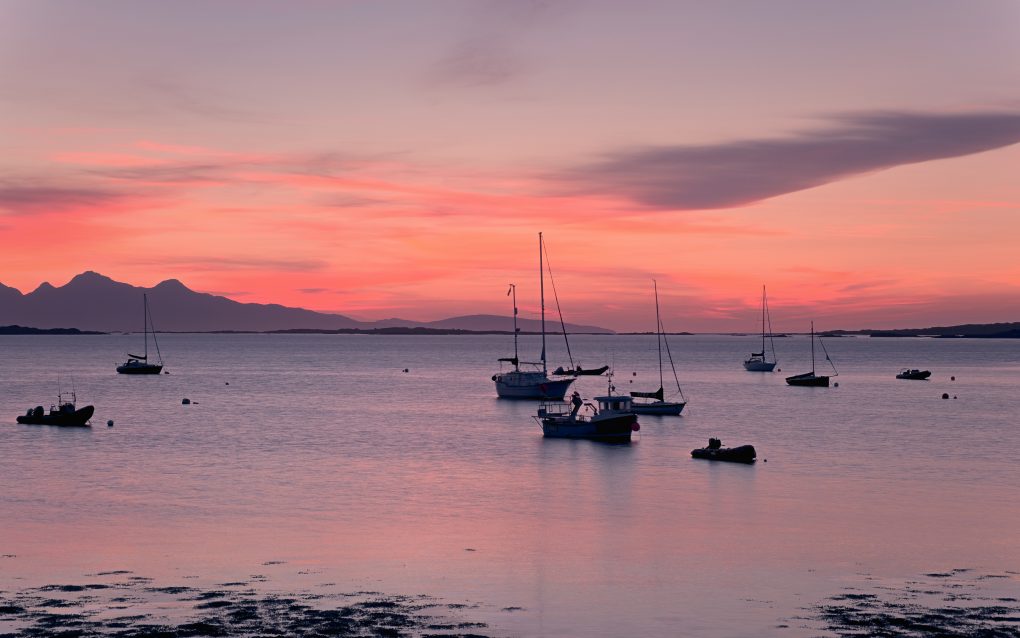
After a day exploring outside and around Mallaig, I stopped at Arisaig to catch the sunset and was not disappointed.
First, a couple of obvious scenes at the end of the road, the low warm light skimming lines of rock
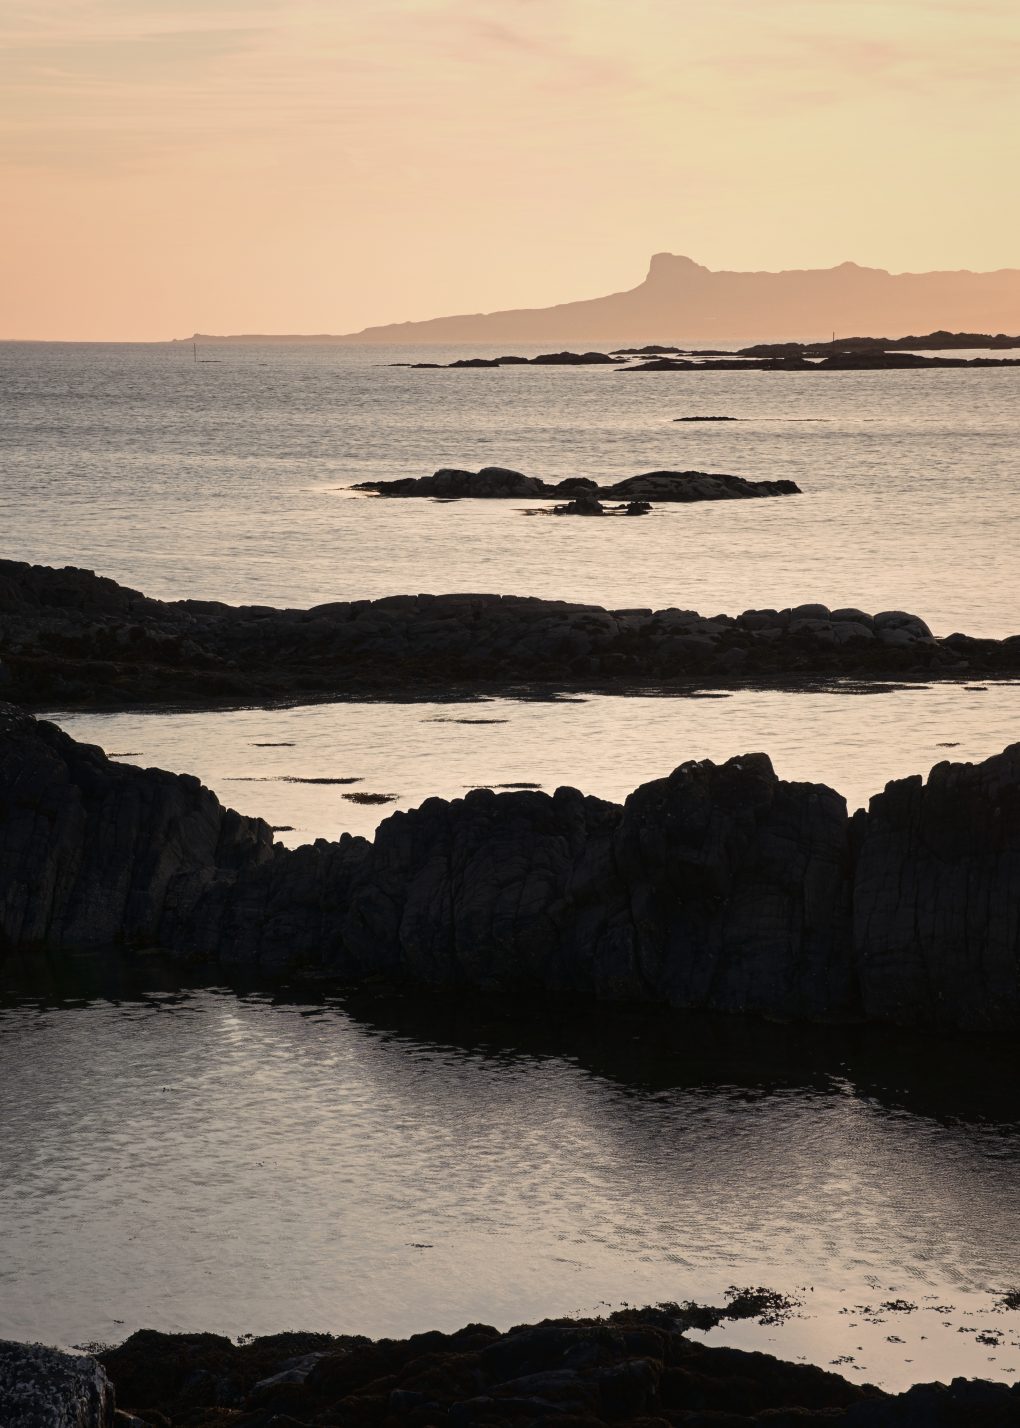
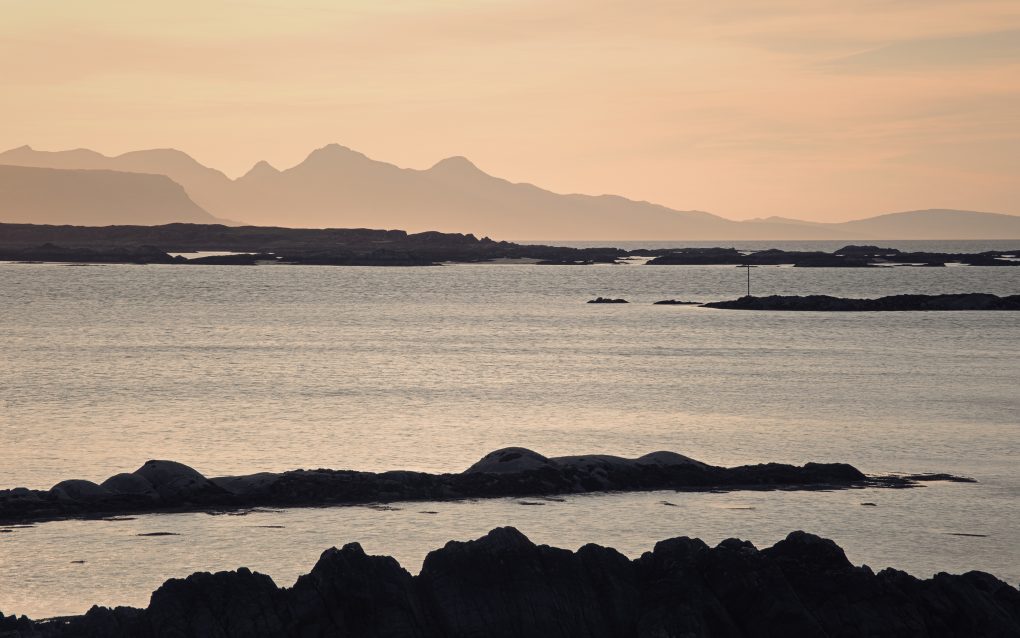
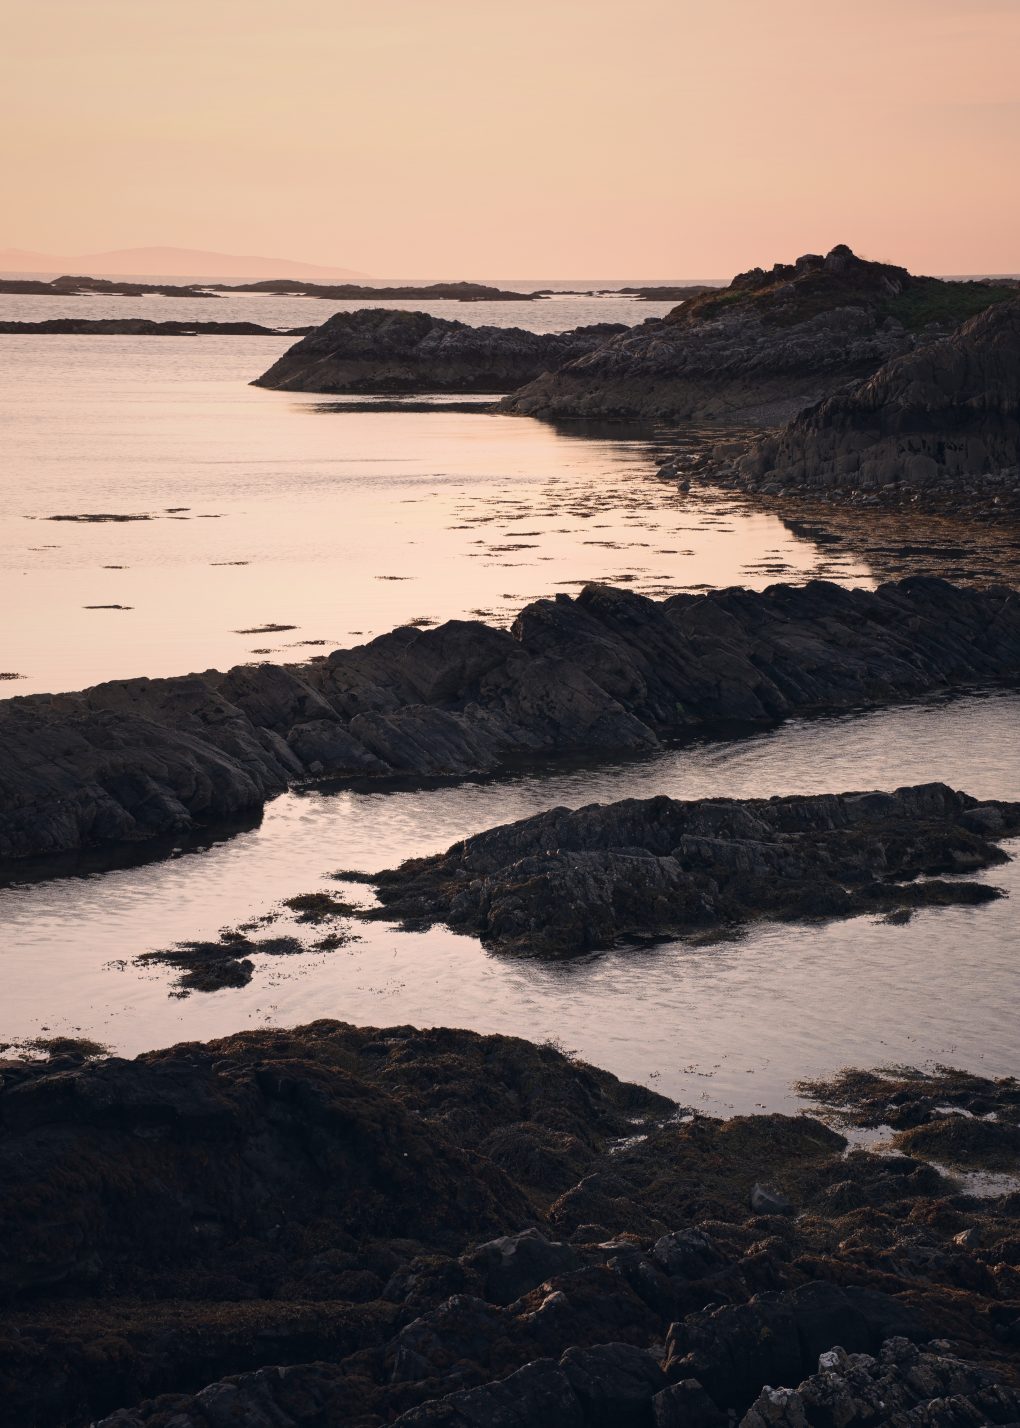
I flew the drone a little way out over Loch nan Ceall for a more elevated perspective. The light was turning red, catching the rugged hills nearby
The view out west directly toward the setting sun was particularly impressive

The 360º panorama is one of my favourite art-forms: for best results, the optimum workflow is:
[sphere url=”http://soc.sty.nu/wp-content/uploads/2021/09/PANO0001-PANO0026-v2_blended_fused-0-0017-scaled.jpg” title=”Arisaig sunset over Loch nan Ceall”]
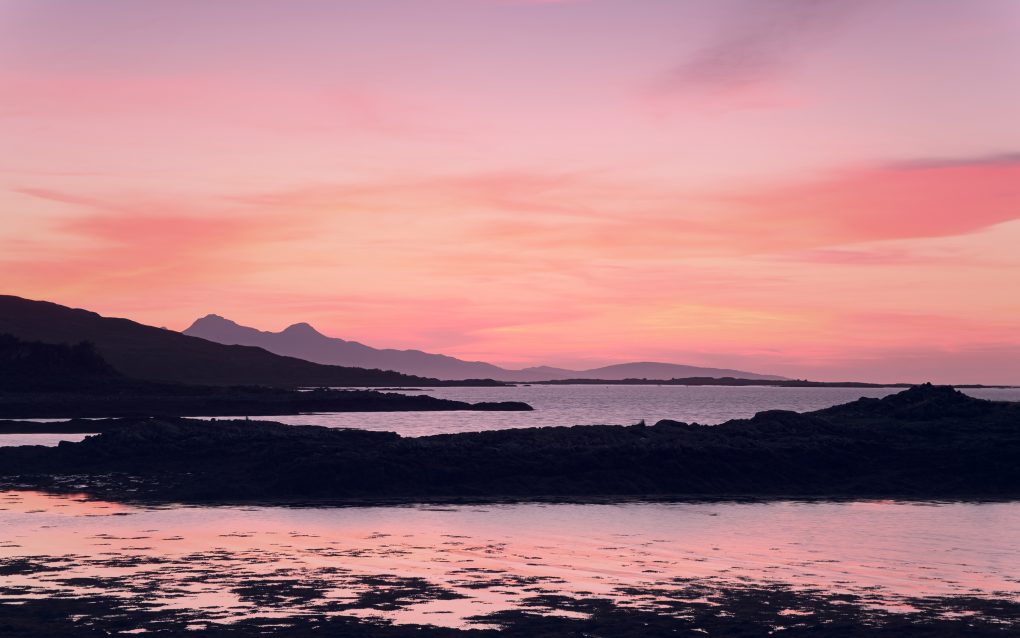
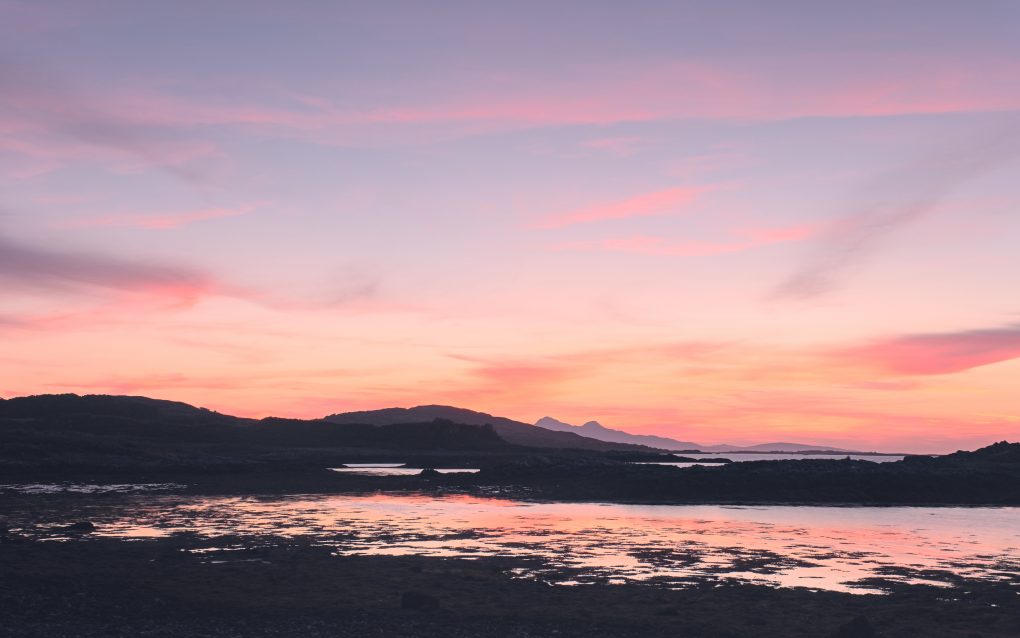
Finally, just as I started the return drive, the sky provided yet more drama to see me on my way:
A selection of the above photos are available on my gallery website as prints, cards, masks and other products: Arisaig on ShinyPhoto.
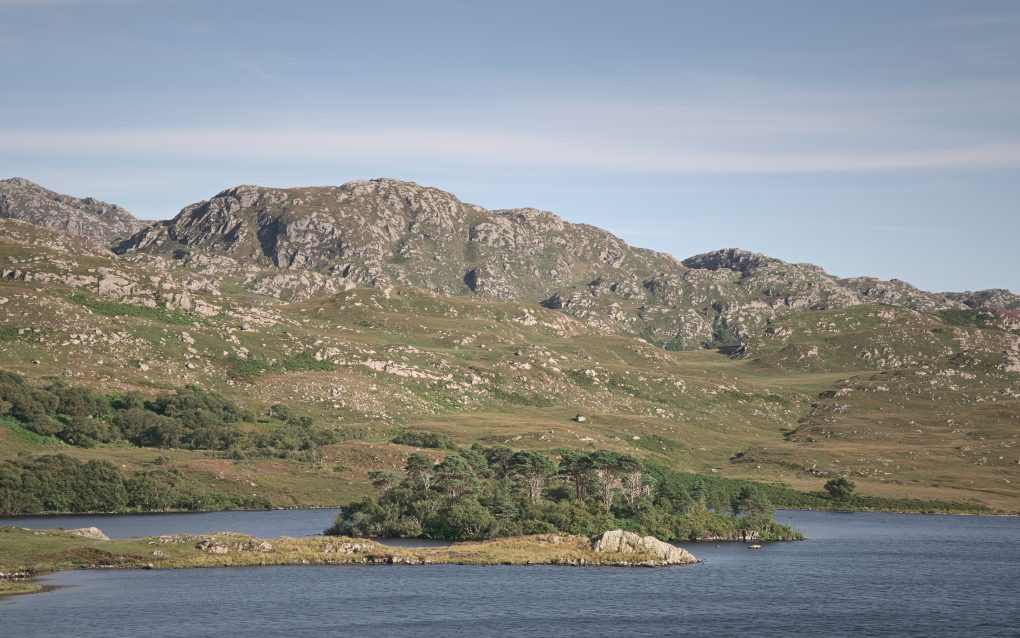
On a whim, I spent my August bank holiday out and about exploring a new location: on the far west coast, Mallaig is home to the ferry port connecting to Skye.
Just to the south of the town lies Loch an Nostaire – a lovely shallow loch of clear pure water and indeterminate name etymology: the current spelling is clearly anglicised, although there are no mentions of the more obvious Gaelic Nostaraidh, but rather variations include “Nosaraidh” and “Nossery” according to the 1852 Admiralty Charts. One option is for the name to date back to Old Norse naust, a ship; an alternative derivation might be via Gaelic nòsar, juicy, sappy, white. This would be cognate with nòs, cow’s milk, which sits well with one of the tributary burns being called the Allt a’ Bhainne.
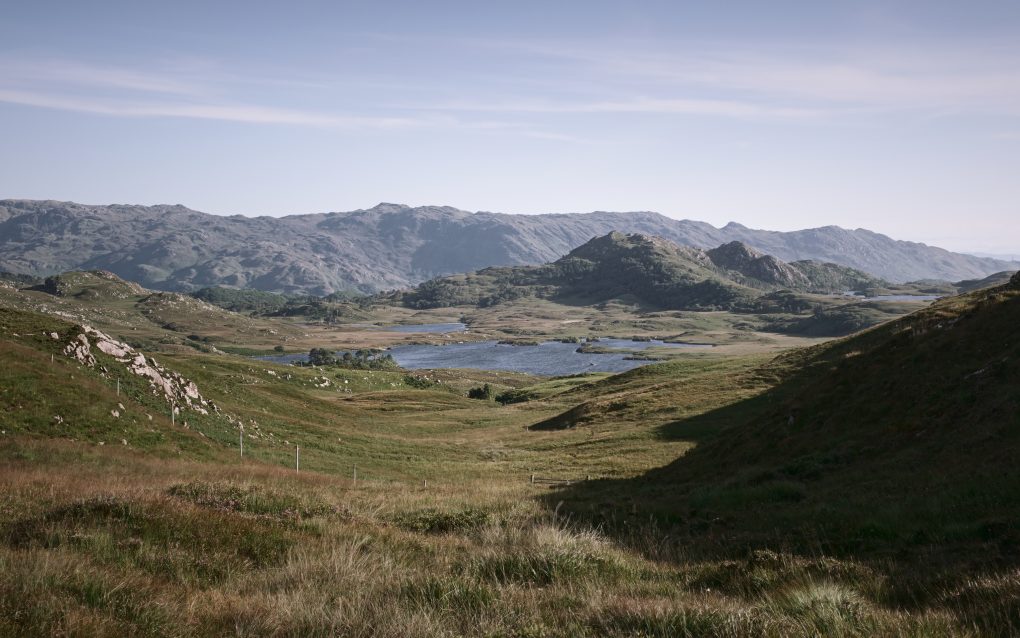
The Mallaig Circular walk leads from Glasnacardoch just off the Rathad nan Eilean inland to the loch, then up between the hills Creag a’Chait and Cruach Mhalaig before descending to Mallaig.
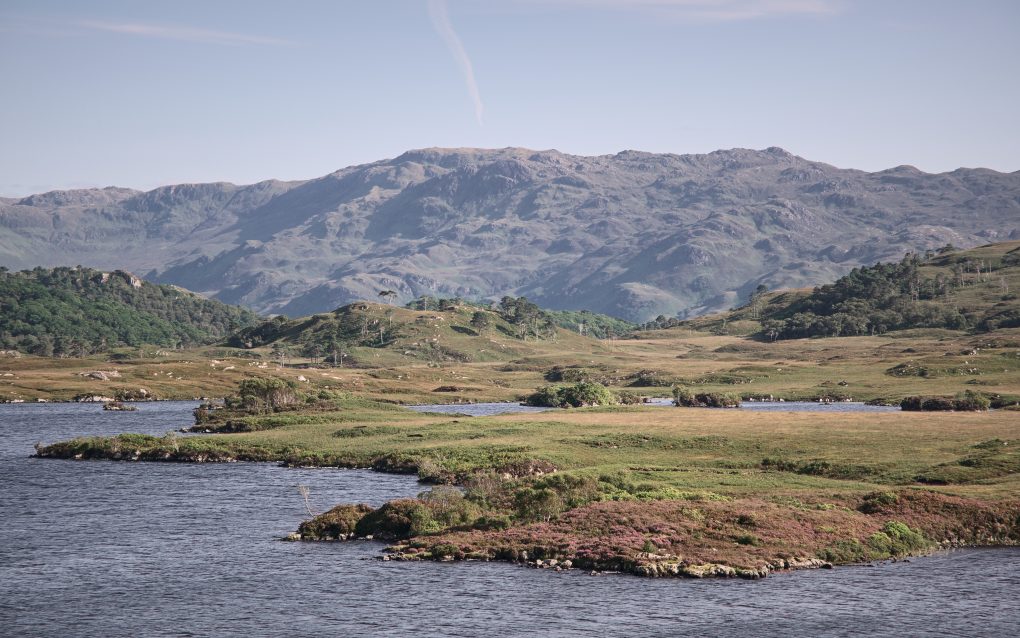
The view down the loch, especially from higher up, is beautiful: to the east the hills of Cruach Clachach and Cruach Bhuidhe are quartzite outcrops forming a backdrop behind an unnamed island on the loch covered with native Scots Pine trees; along the opposite side of the loch runs a prominent ridge where Morar schist pelite changes to psammite.
[sphere url=”http://soc.sty.nu/wp-content/uploads/2021/09/PANO0001-PANO0026-0-0005.jpg” title=”%title%” navbar=”yes”]
[sphere url=”http://soc.sty.nu/wp-content/uploads/2021/09/PANO0001-PANO0026-v3-0-0011.jpg” title=”%title%” navbar=”yes”]
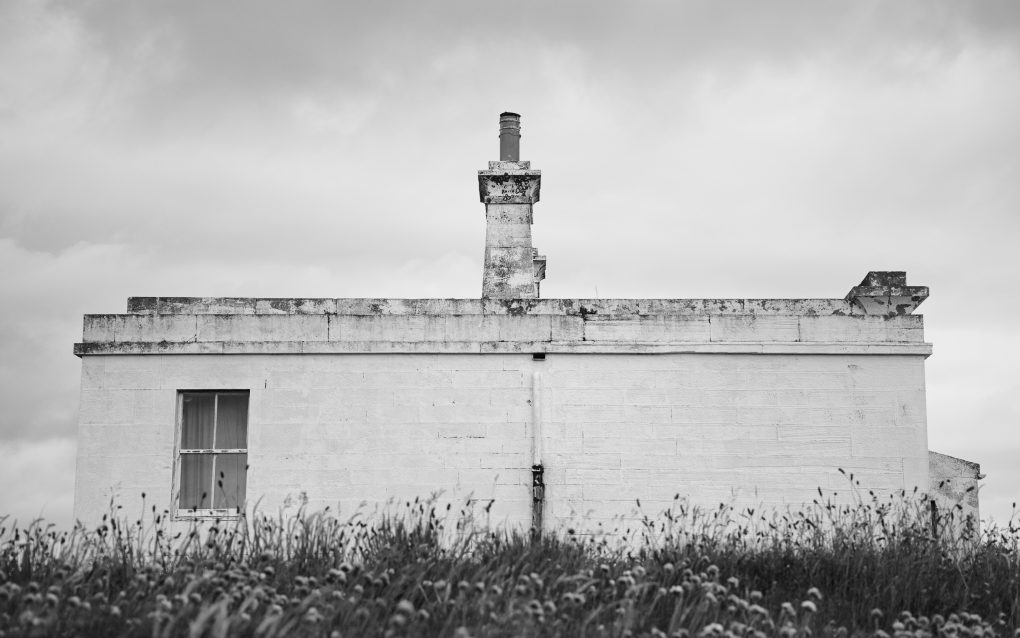
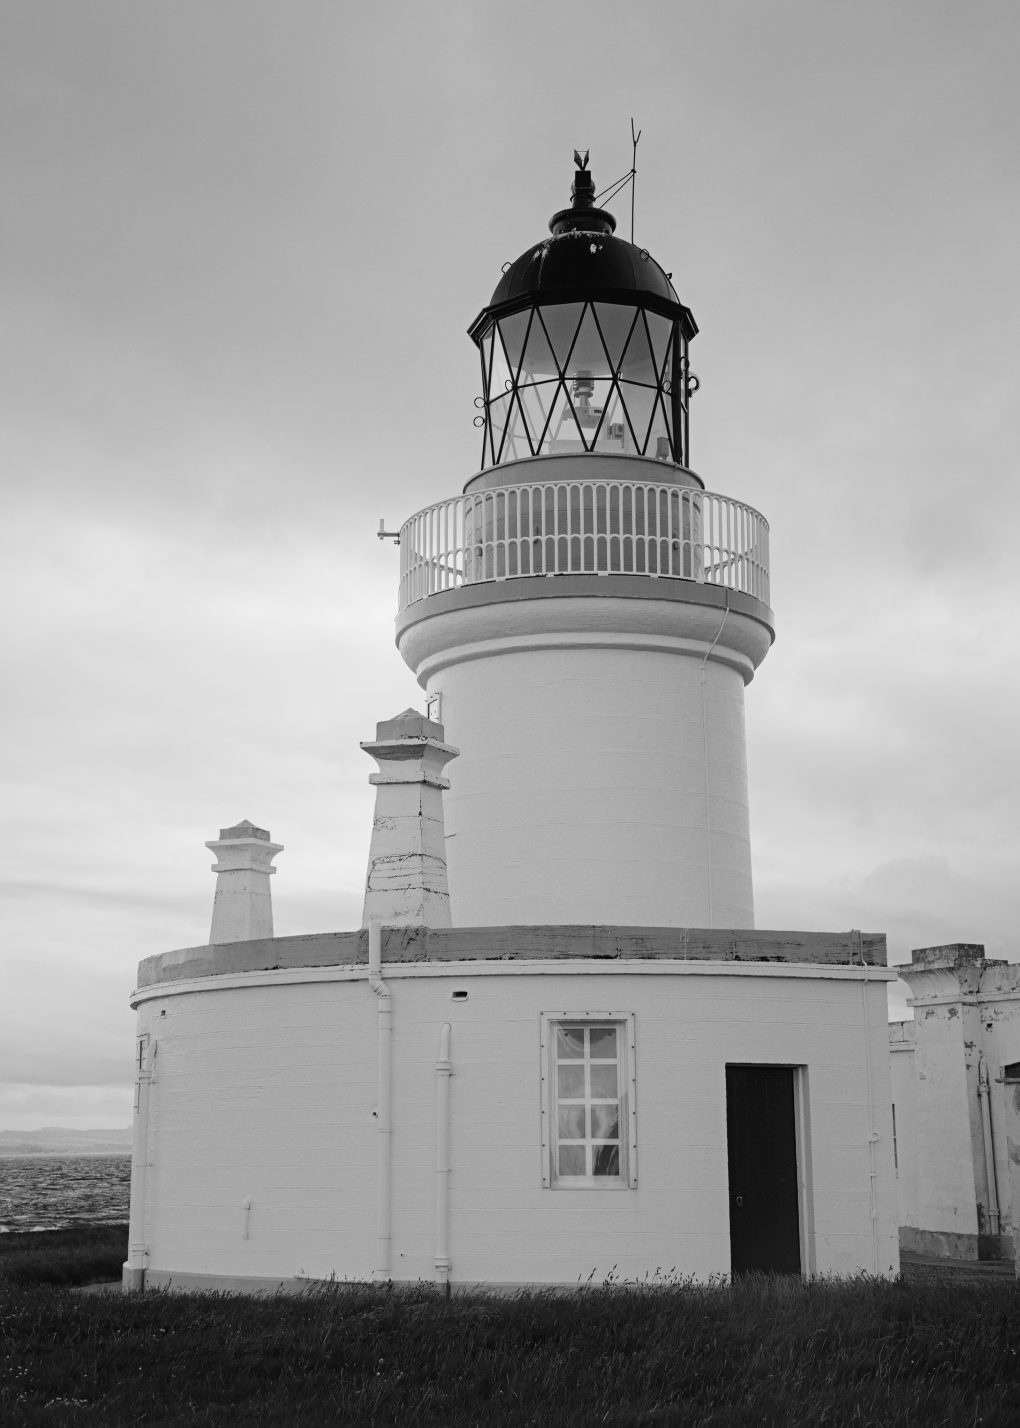
Last weekend it was ludicrously hot around home – 25ºC after lunchtime – so we drove all the way up north to the Black Isle for a stroll around Fortrose and neighbouring areas. We started with a stroll down to Chanonry Point where the lighthouse looked good in black & white.

Noctilucent (“night-shining”) clouds are the highest in the atmosphere, at around 76-85km altitude. They only appear in the summer months at latitudes from 50-70º (north or south), when the sun is more than 6º below the horizon. Formed in the mesosphere at very cold temperatures from ice, dust and water vapour, their gossamer threads undulate and shimmer in shades of electric blue.
There was a particularly decent display on Friday/Saturday morning – I nipped out and spent a happy hour making the video:
Timelapse: Sony a7r3, Sigma 14-24mm lens, SkyWatcher StarAdventurer tracking mount for rotation
Stills: Fuji X-T4, 16-80 f/4 lens
A selection of the images are available as prints, masks, cards and other products (even socks and jigsaw puzzles!) from my main website: ShinyPhoto: Noctilucent Clouds
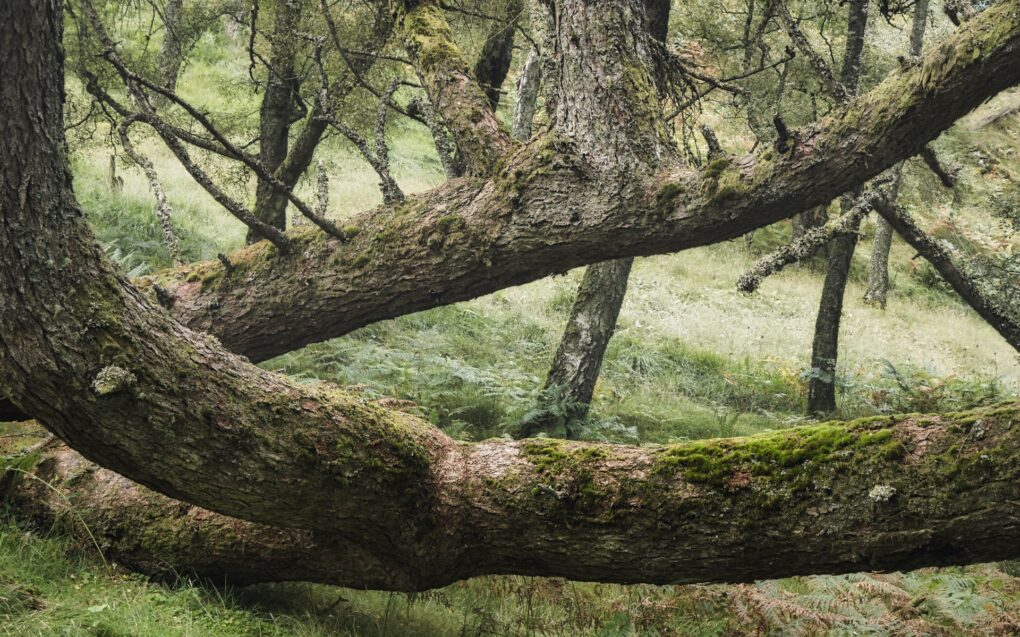
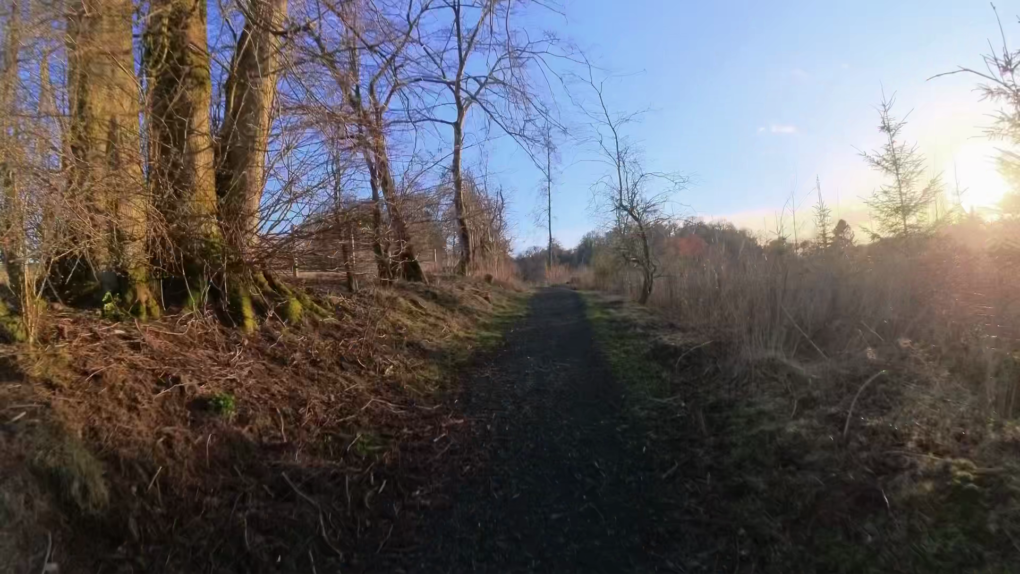
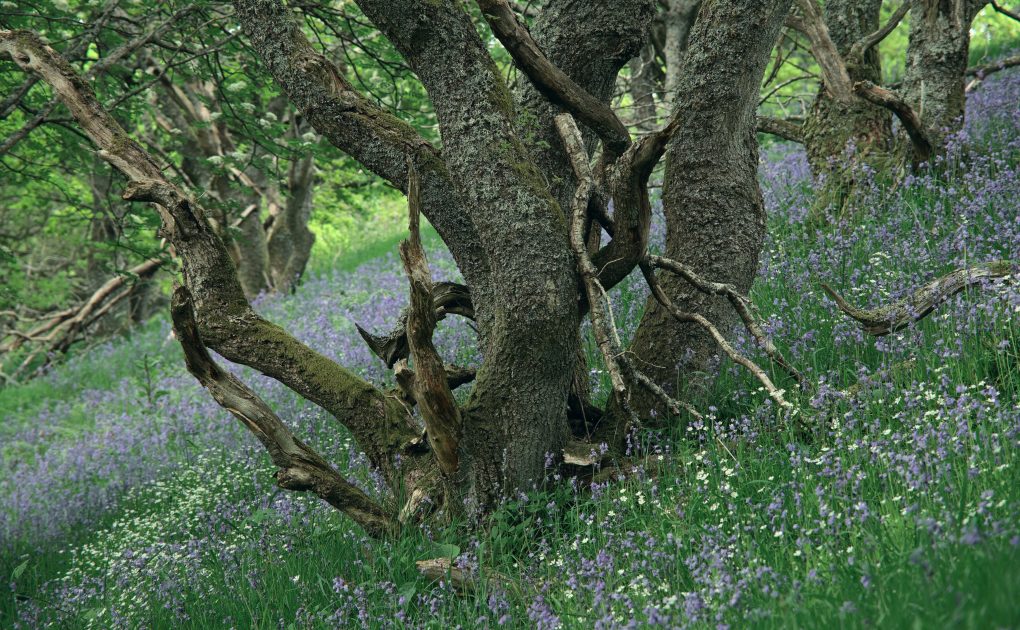
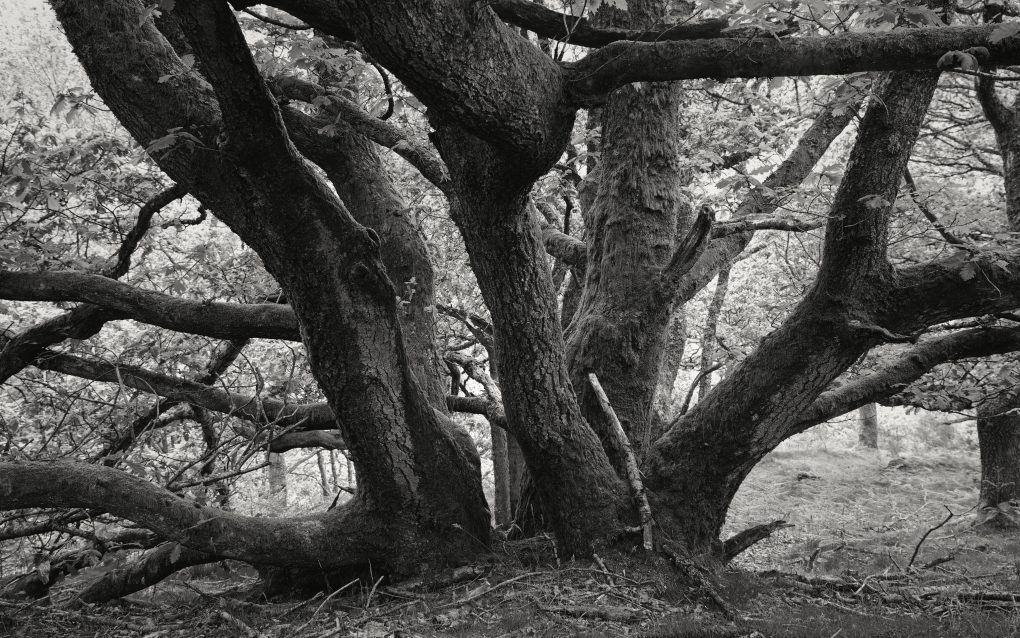
One of my favoured local woodlands, just a few minutes’ drive from home, is Dunning Glen. Starting from the village, stroll up the road, round the corner and through the small doorway into the woods where trees and rivers play.
There are some steep bits, but plenty of the oak trees in particular have a gnarly character.
Herewith, some photos:
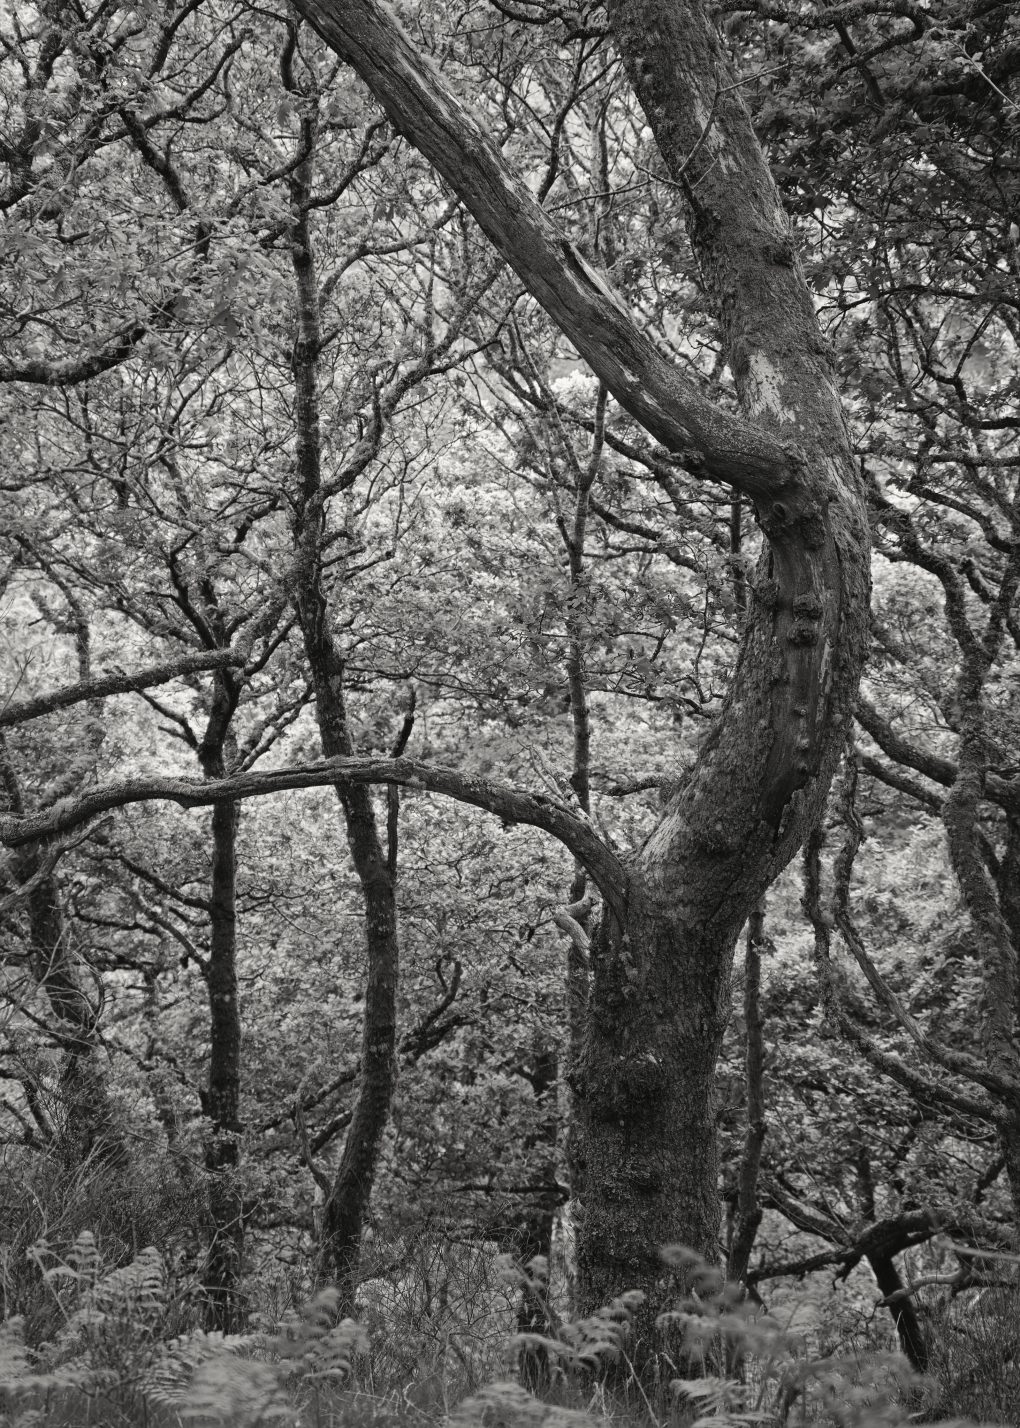
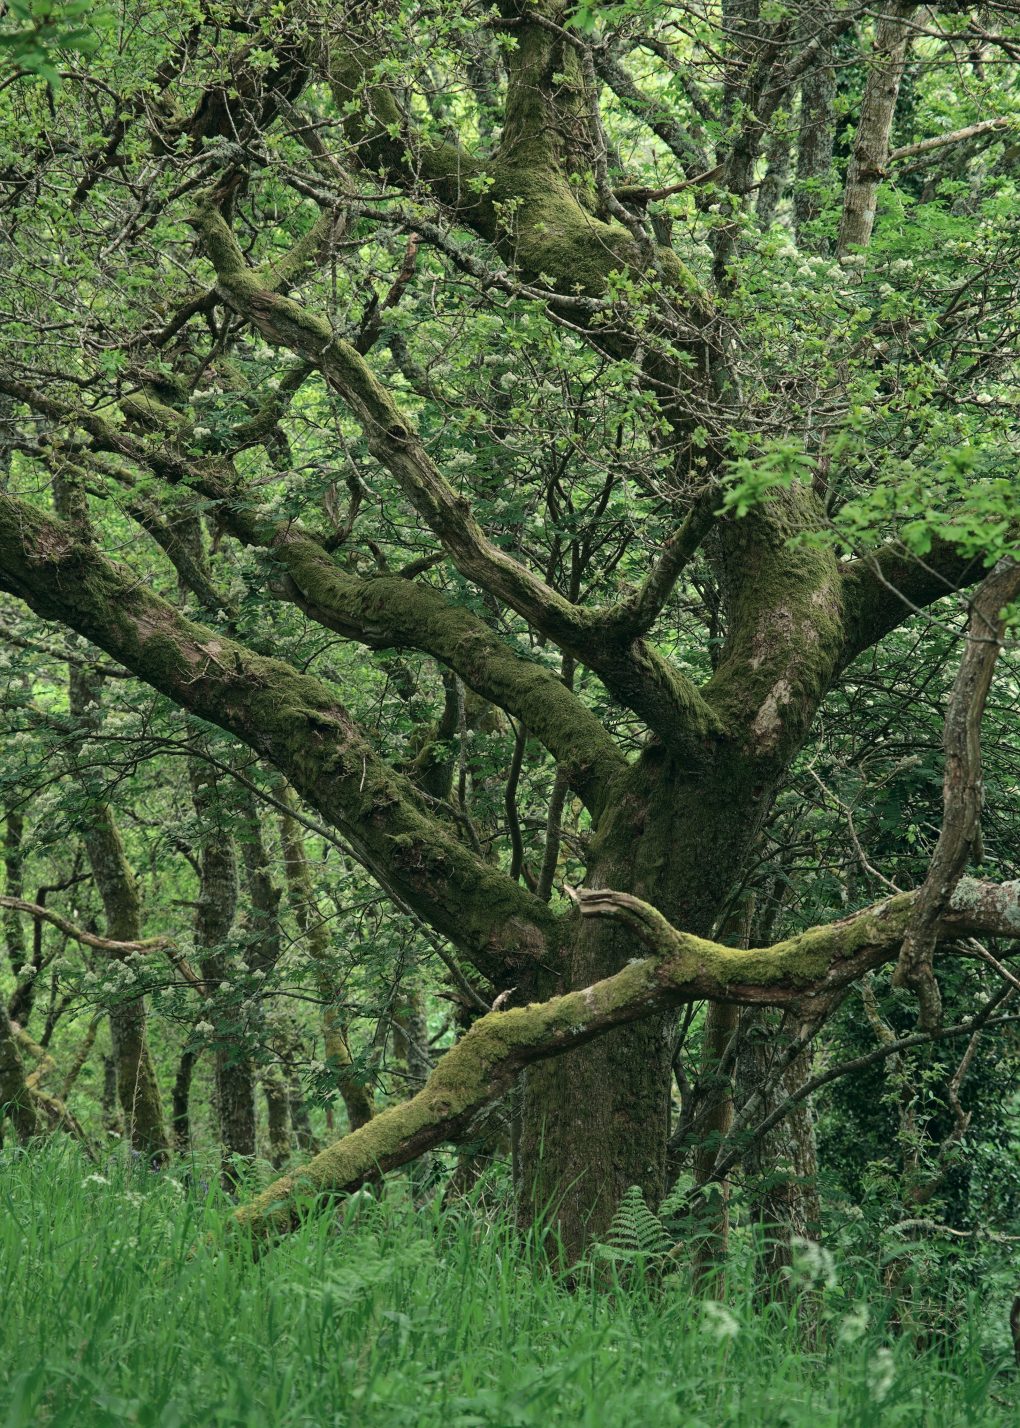
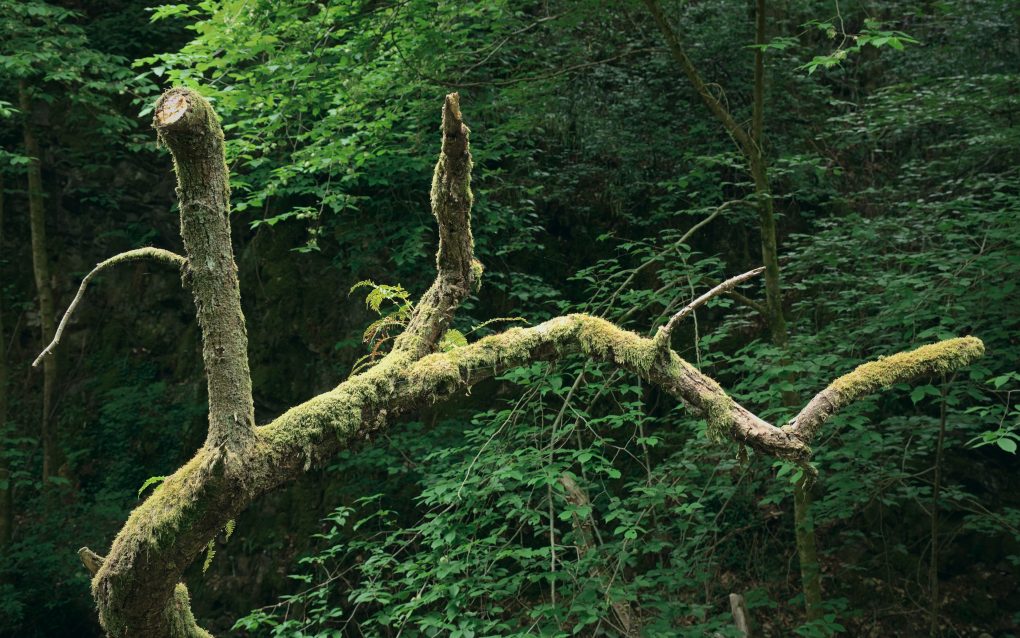
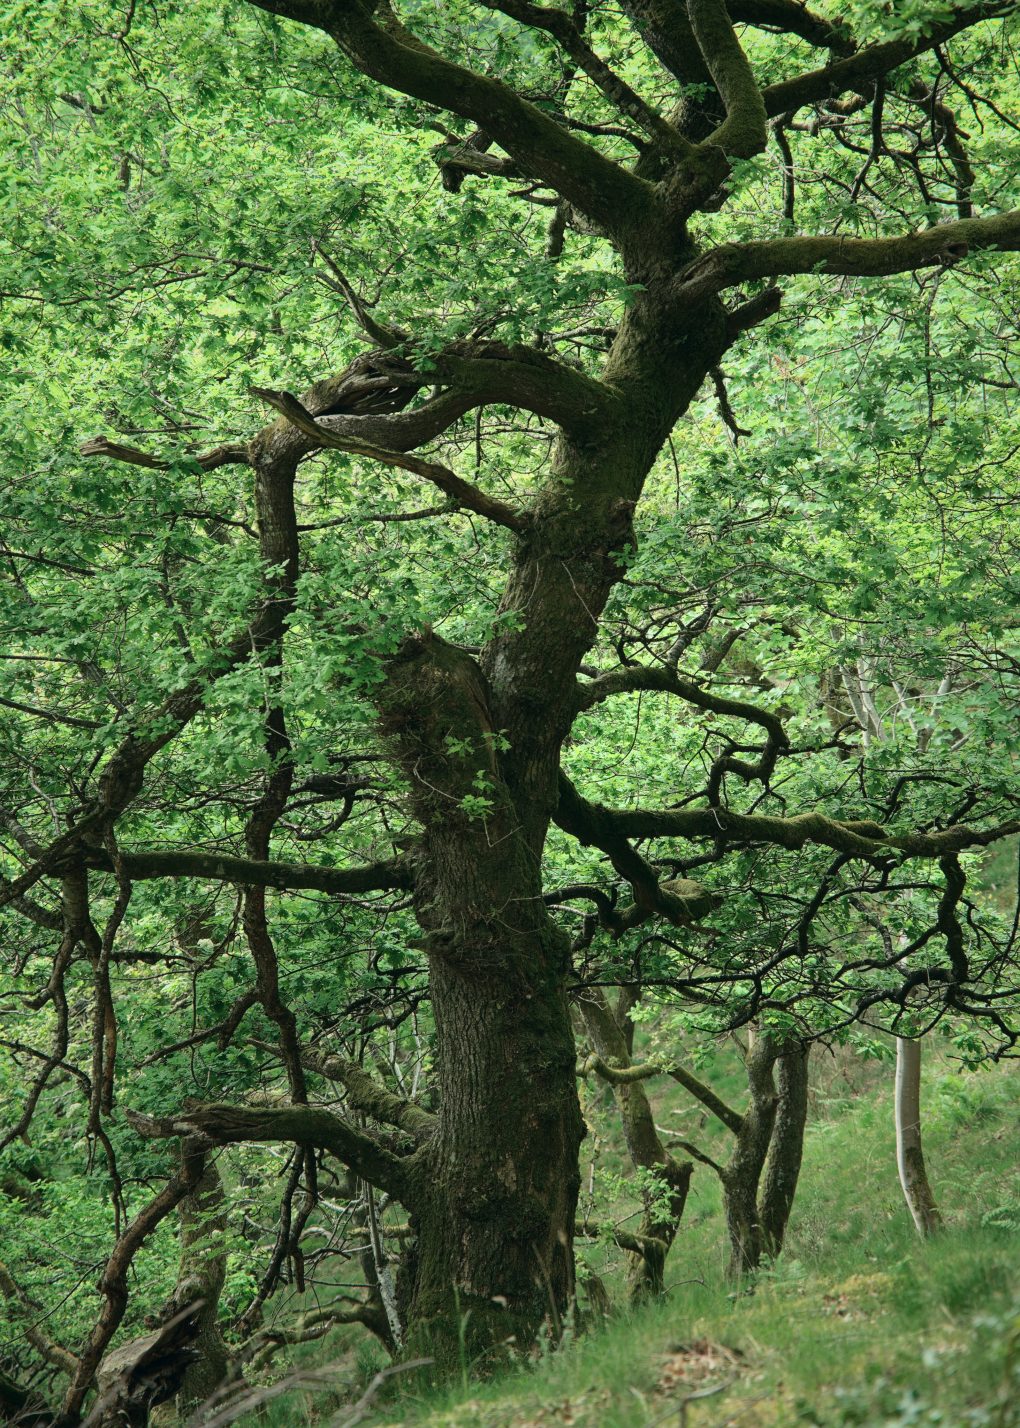
My favourite from this particular afternoon was this oak – some of its branches having rotted and fallen off:
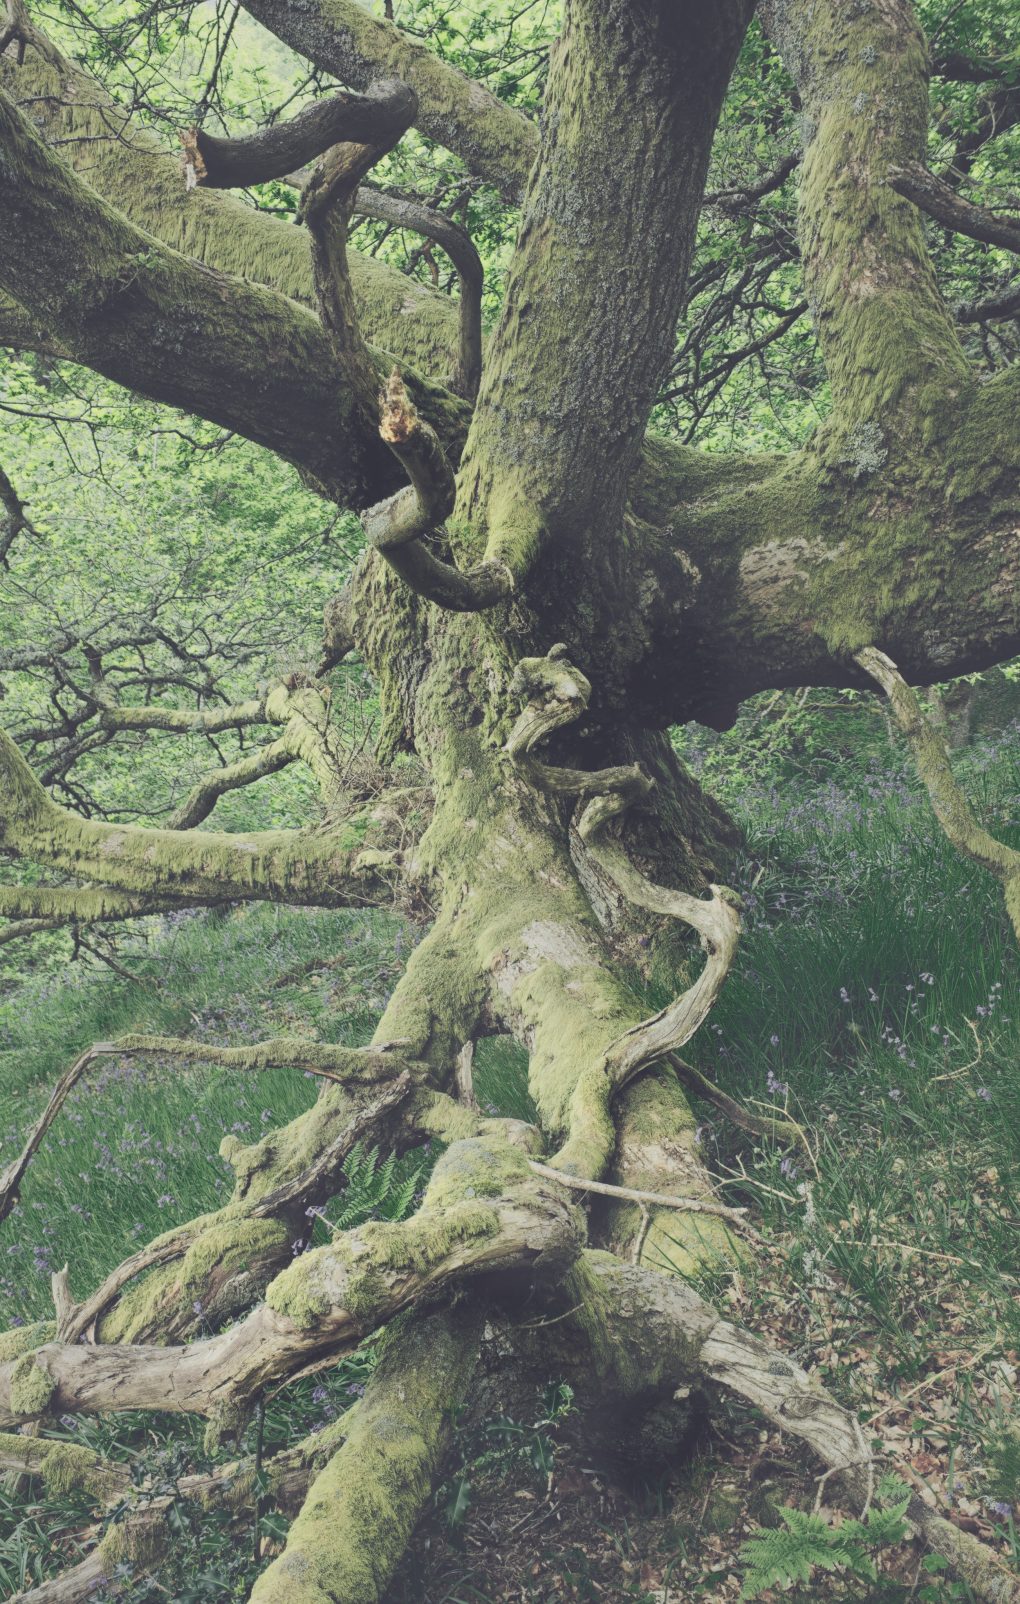
The latter is available as prints, cards, masks and other products, via my main website: there is a pleasure in the pathless woods.
I’ve lost count of the number of times I’ve driven through St Fillan’s over the years, always en route to somewhere else the other end of the A85, barely stopping a handful of times to take the obvious photo the length of Loch Earn. Even the couple of craggy rocky outcrops on the way into the village were much admired from the road but I think I stopped once to shoot them for their own sake.
So last Sunday afternoon I rectified matters, slowed down and parked in the usual layby and walked back through the village, over the road, around the golf course and up St Fillan’s Chair, admiring the mountains behind a little closer.
A day of symmetry – on the way out I noticed a view up the path to a small Church of Scotland kirk was particularly appealing; on return, the view along the loch was pure calm still reflection in the water.
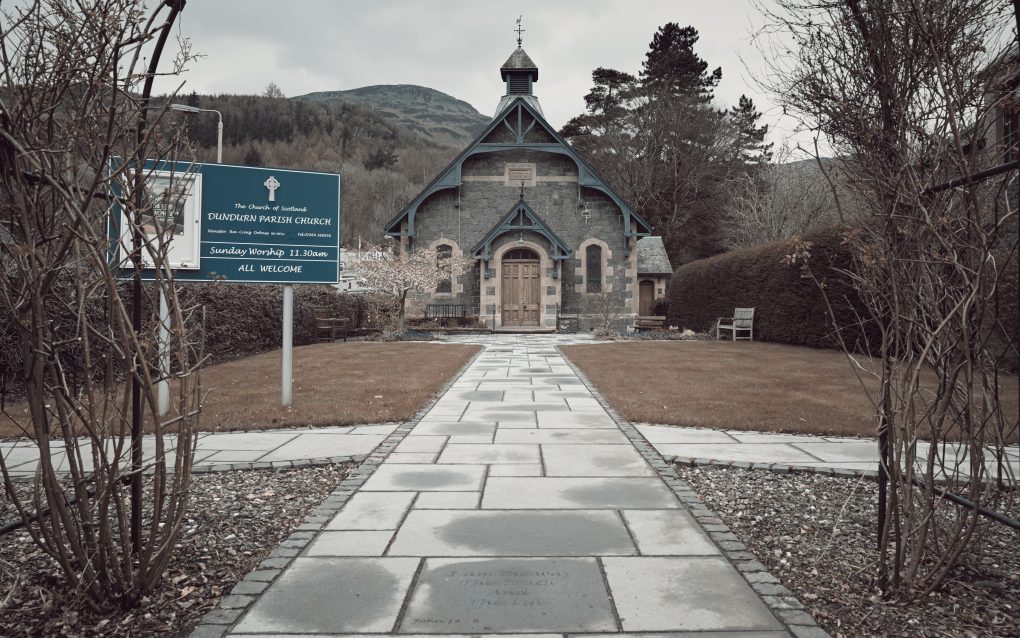
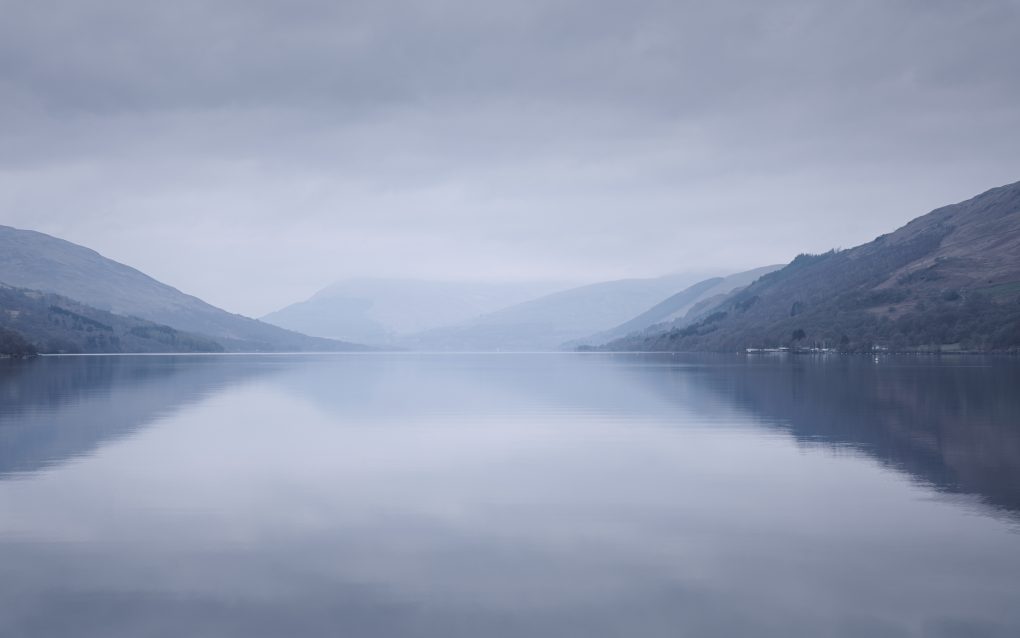
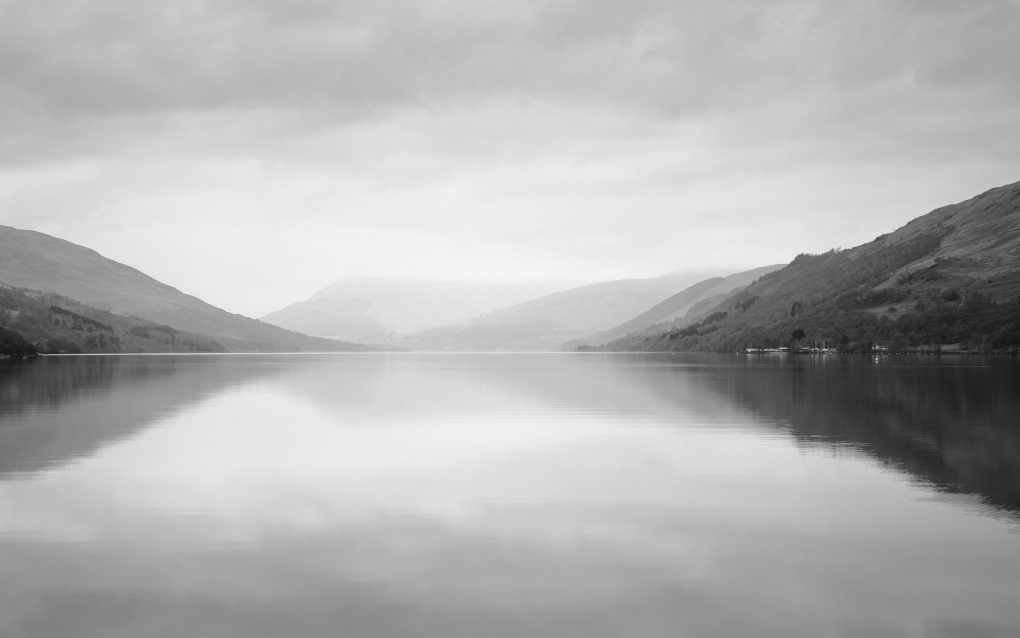
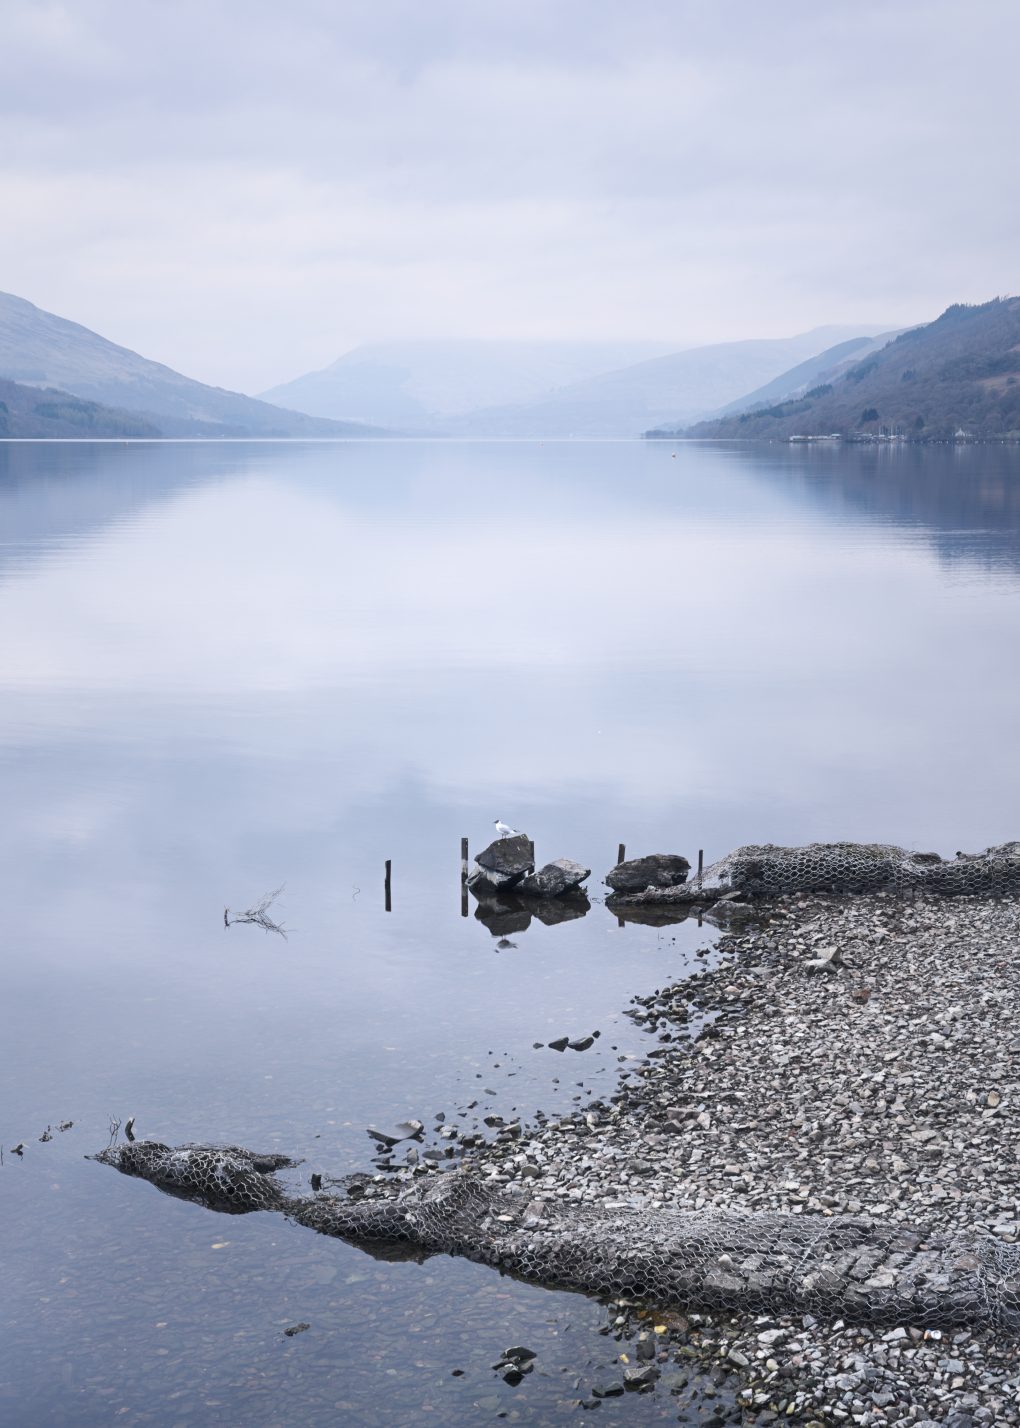
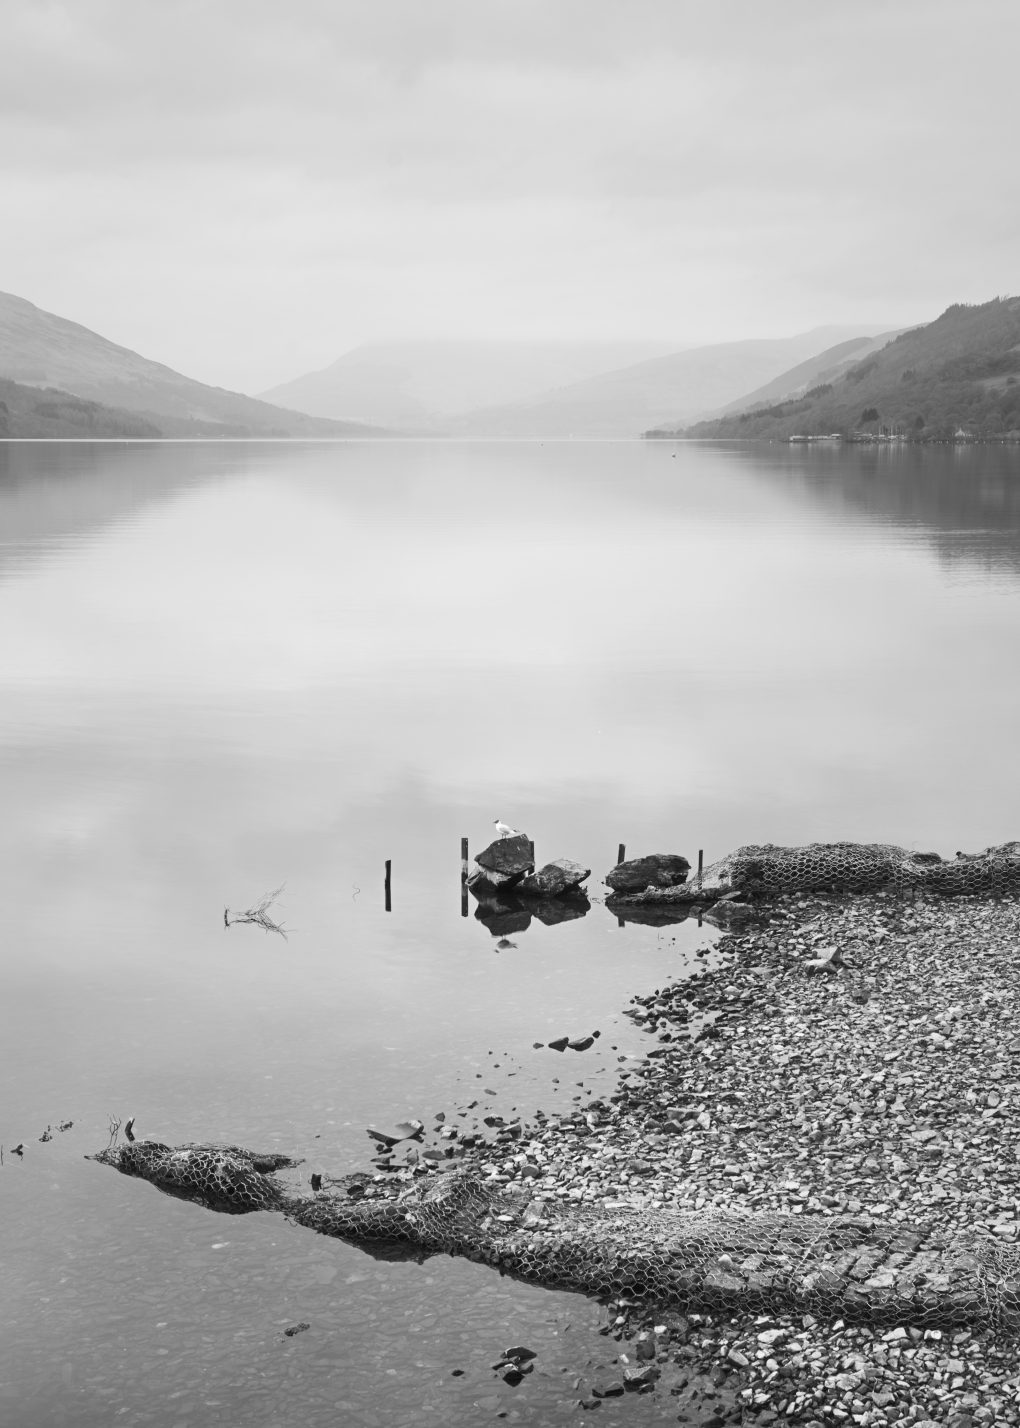

Prints and things are available from my main ShinyPhoto website: Loch Earn.
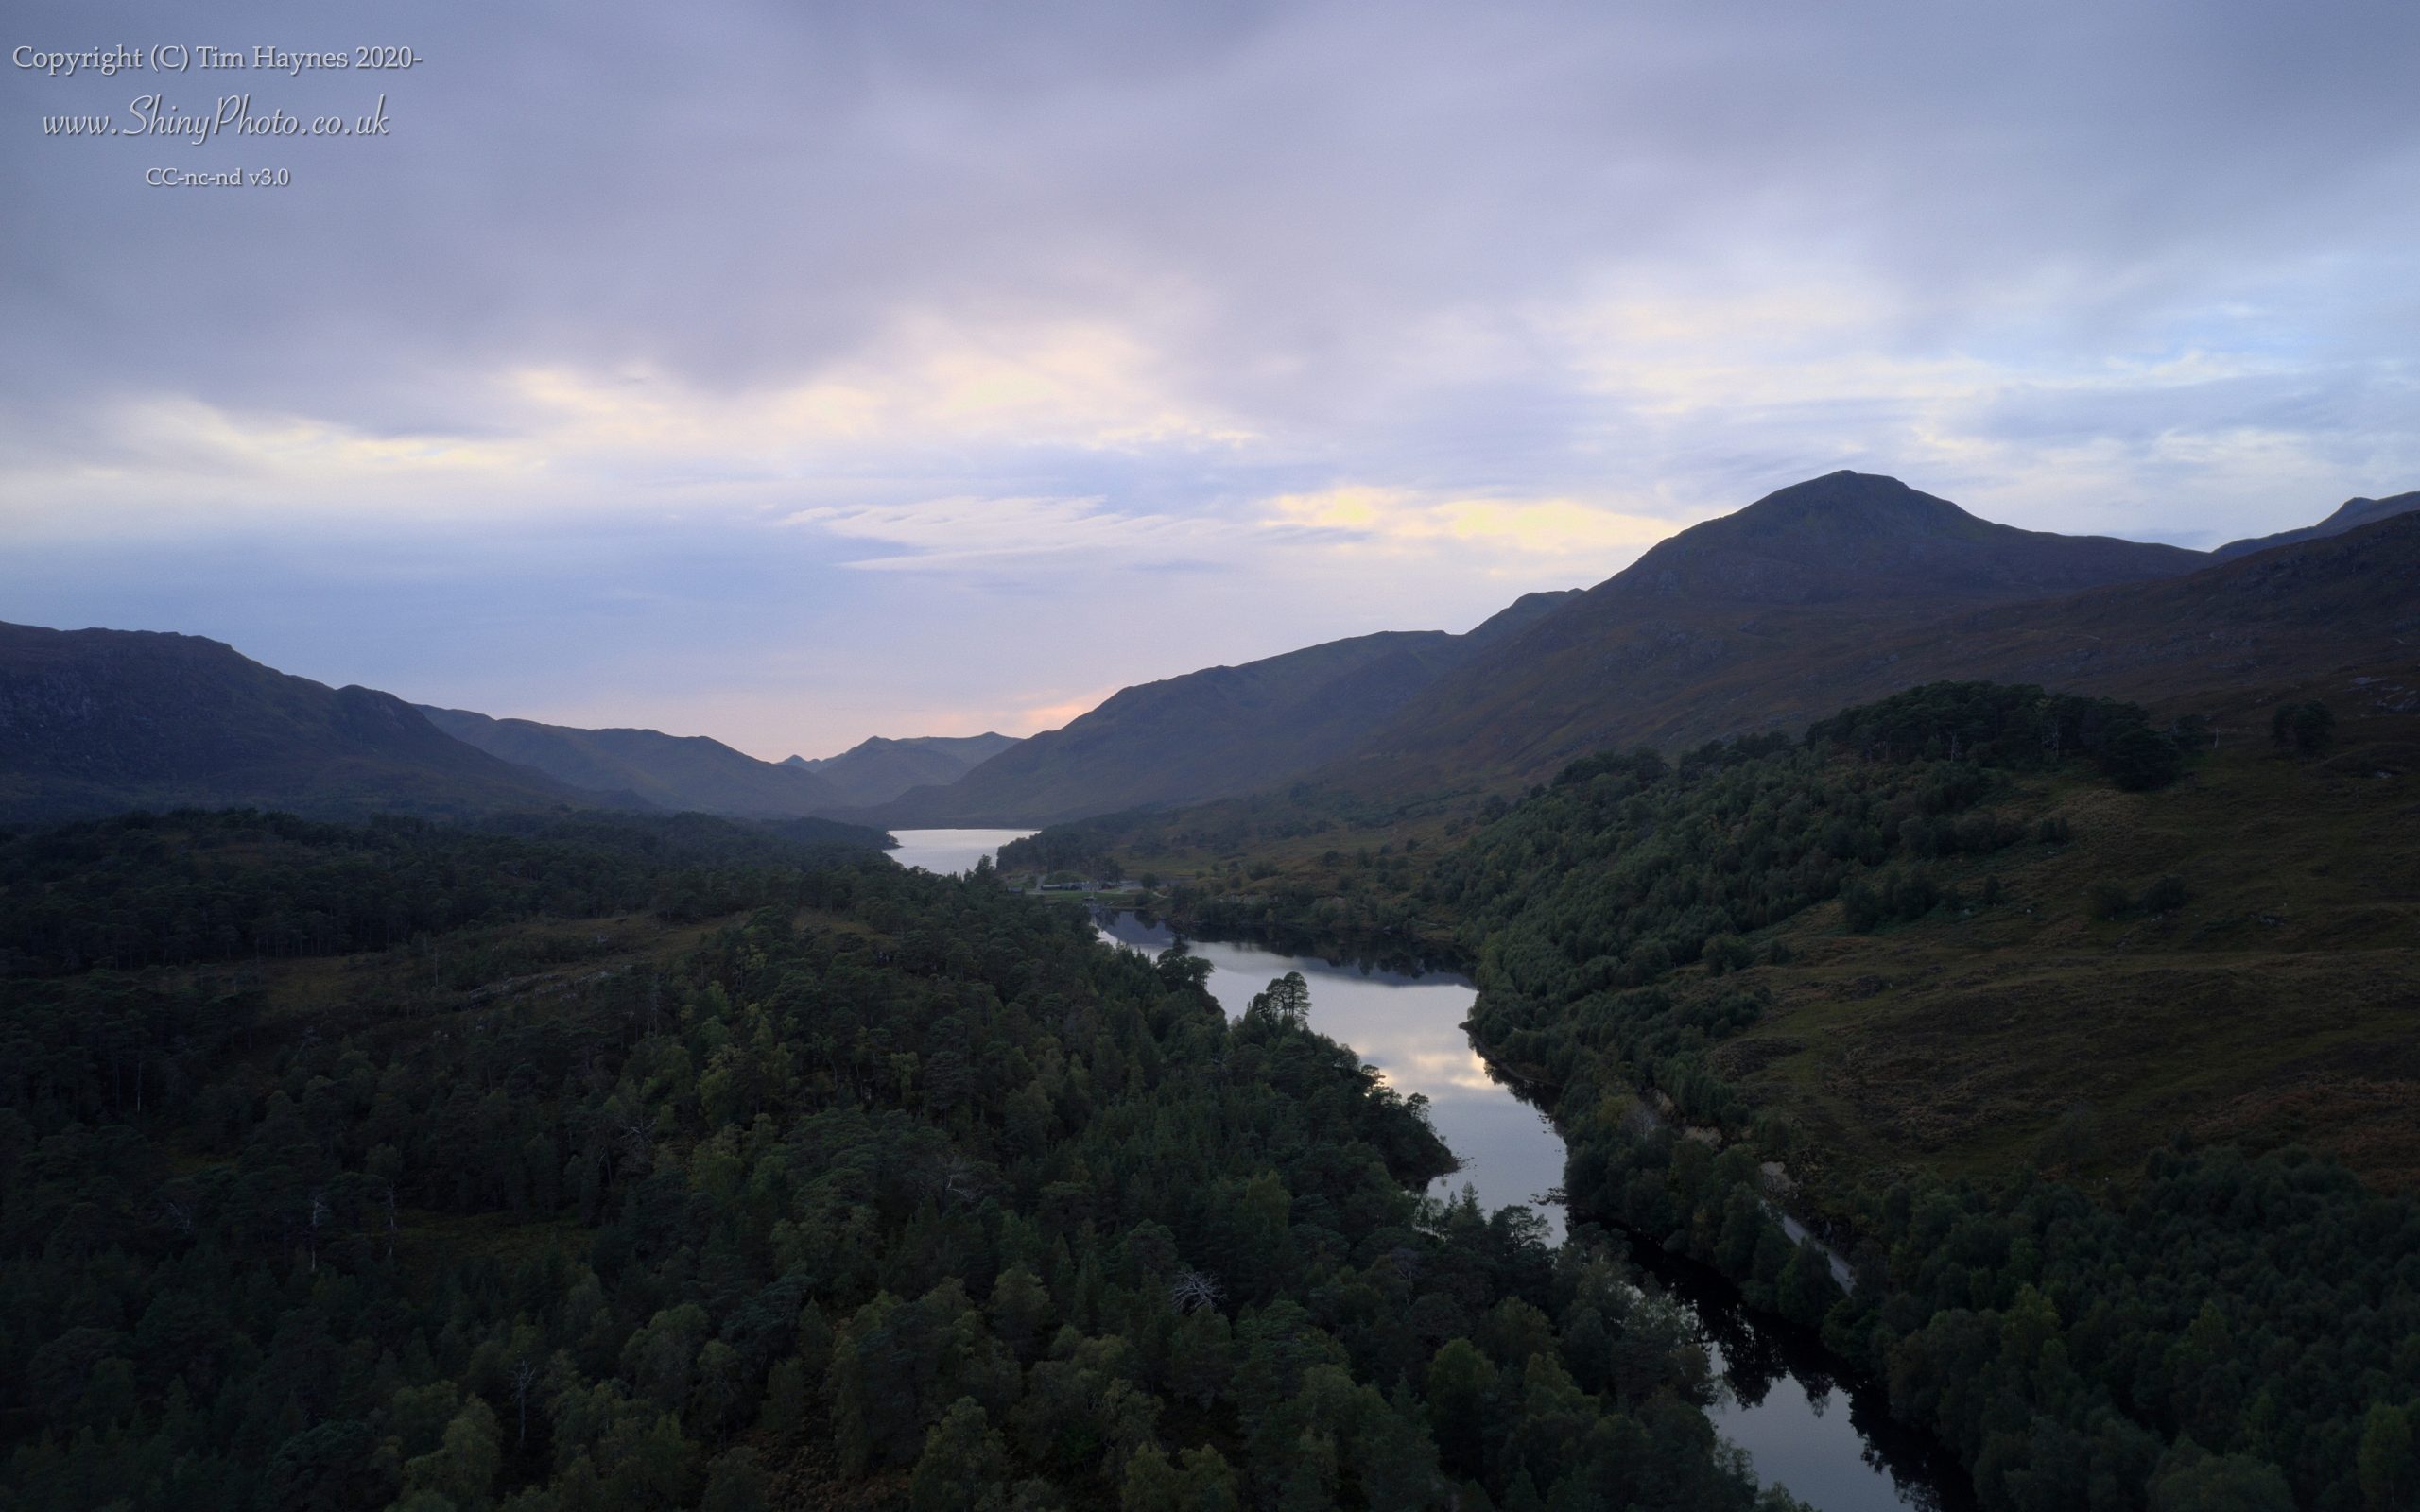
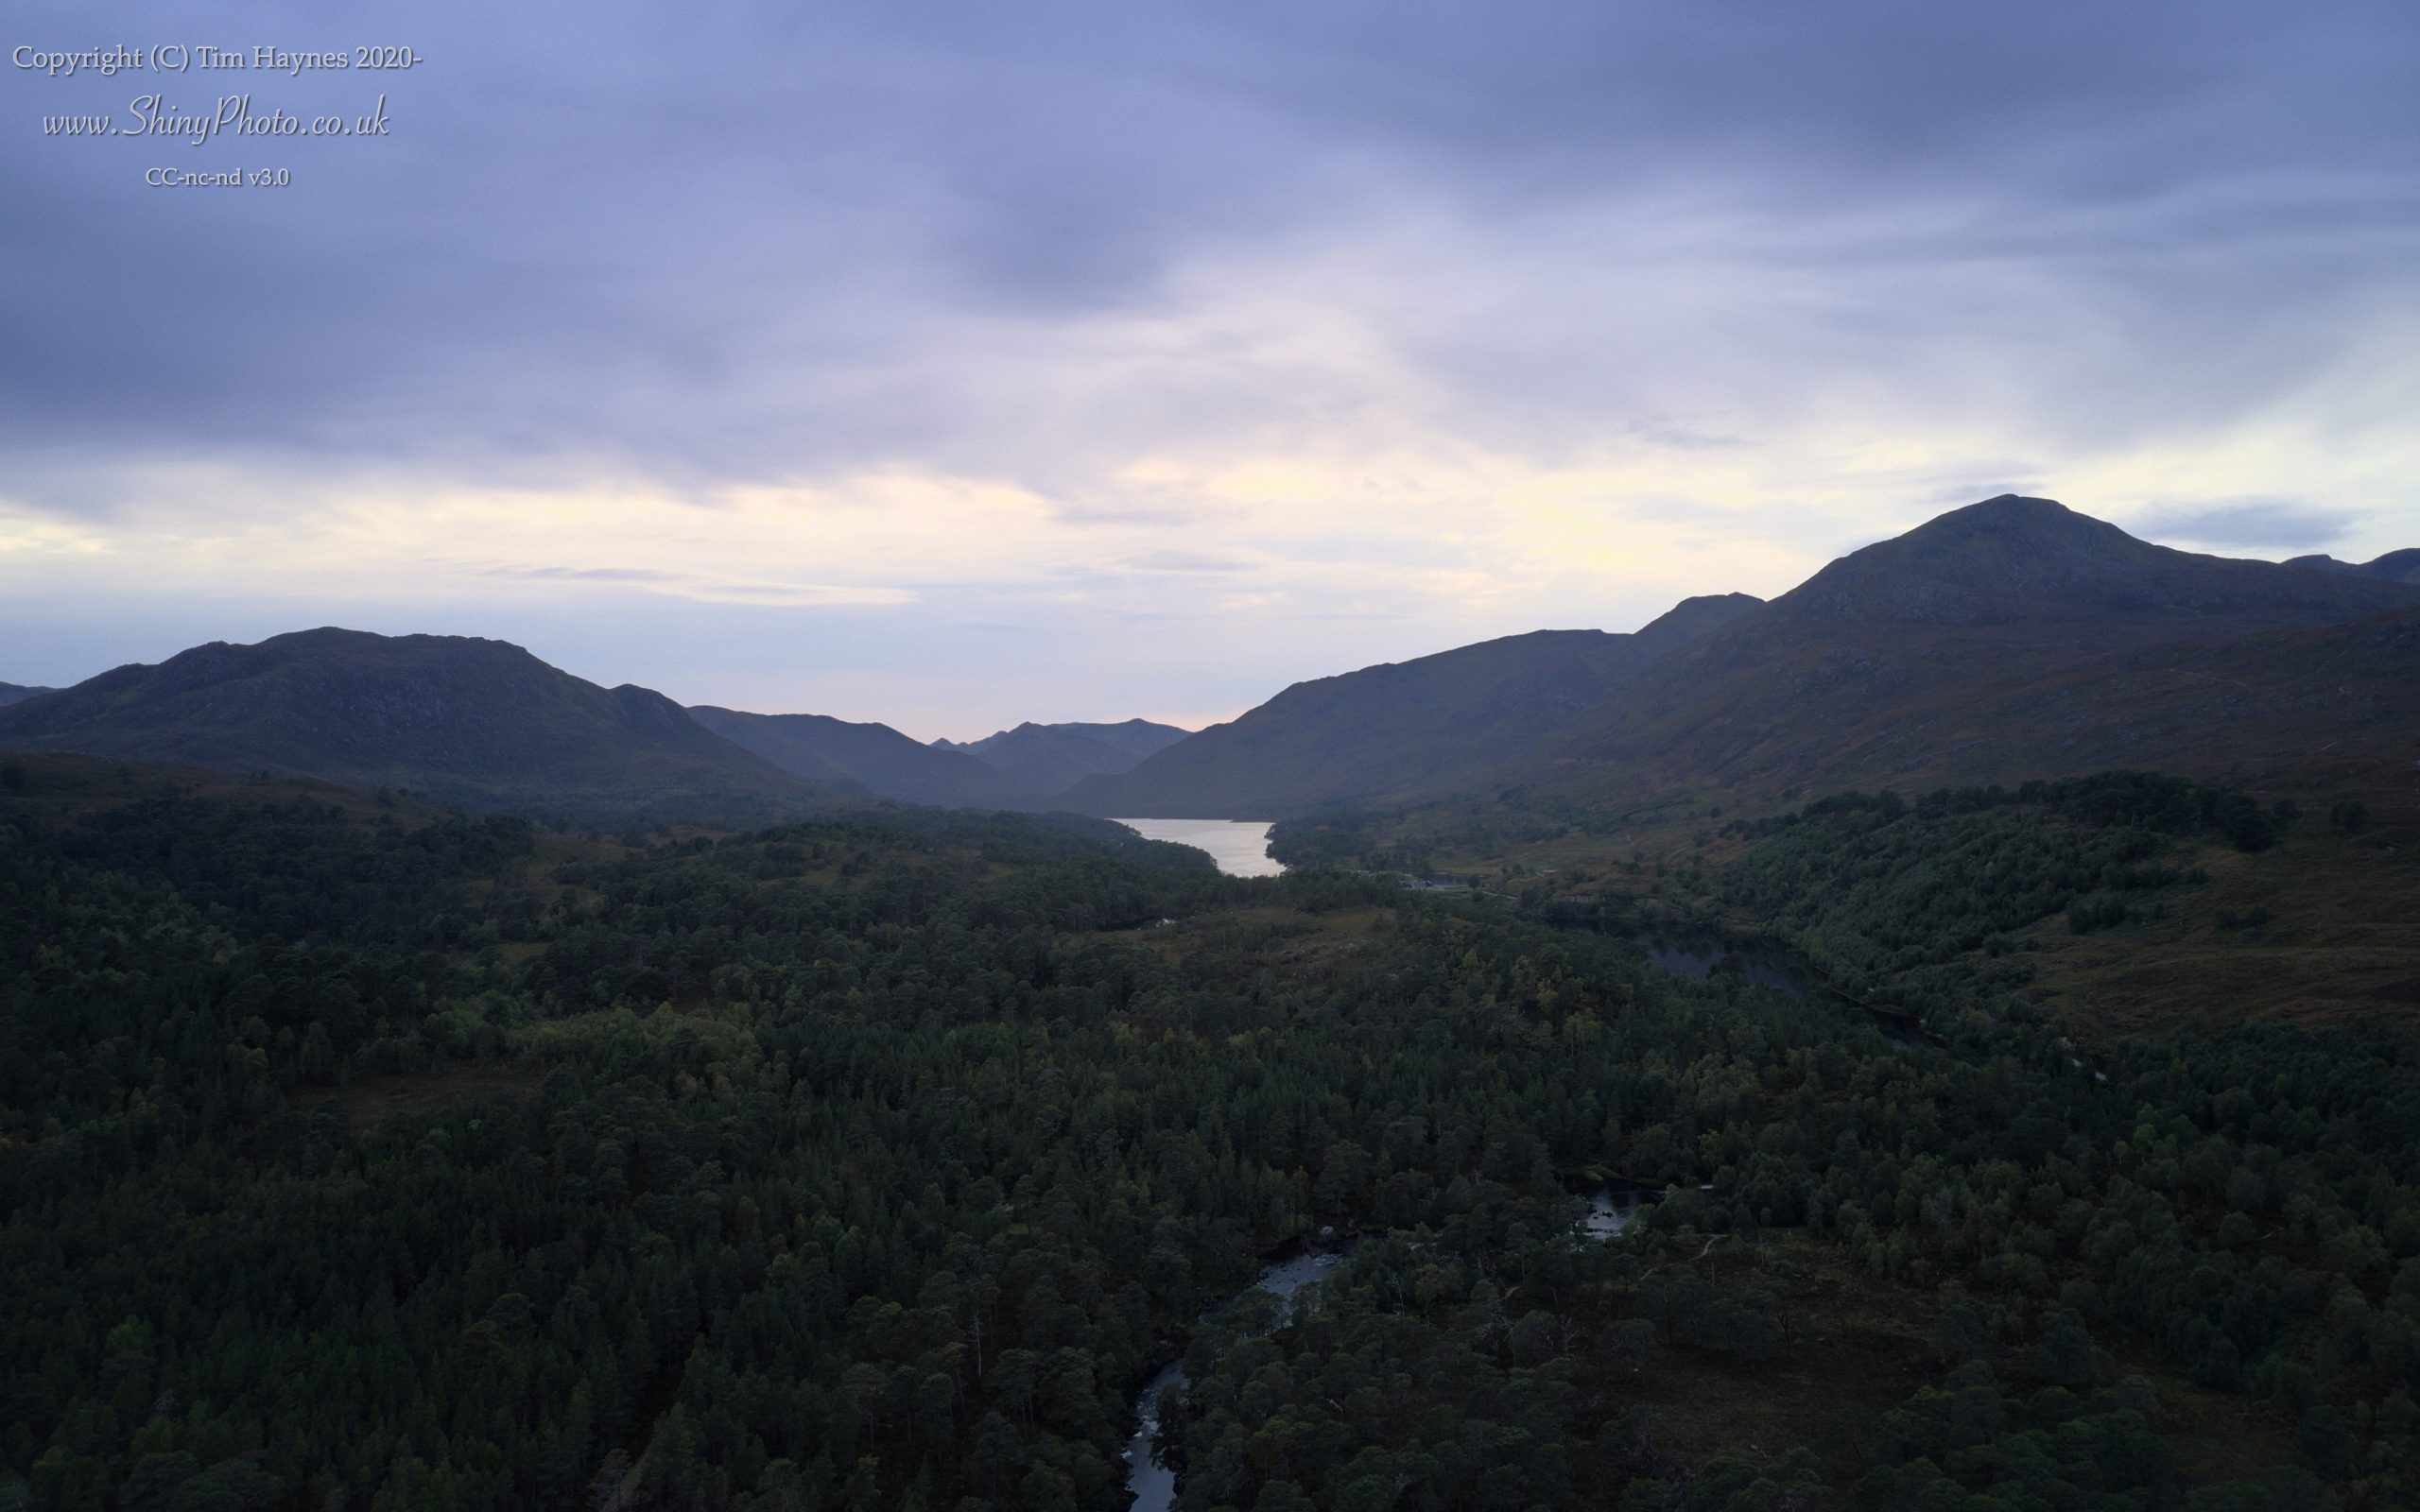
A year without a trip to my Nice Place™ just wouldn’t be a year. It had to be done – in a moment between lockdown and further covid-19 restrictions, I nipped up to Glen Affric for a few hours.
Some intimate landscape views:
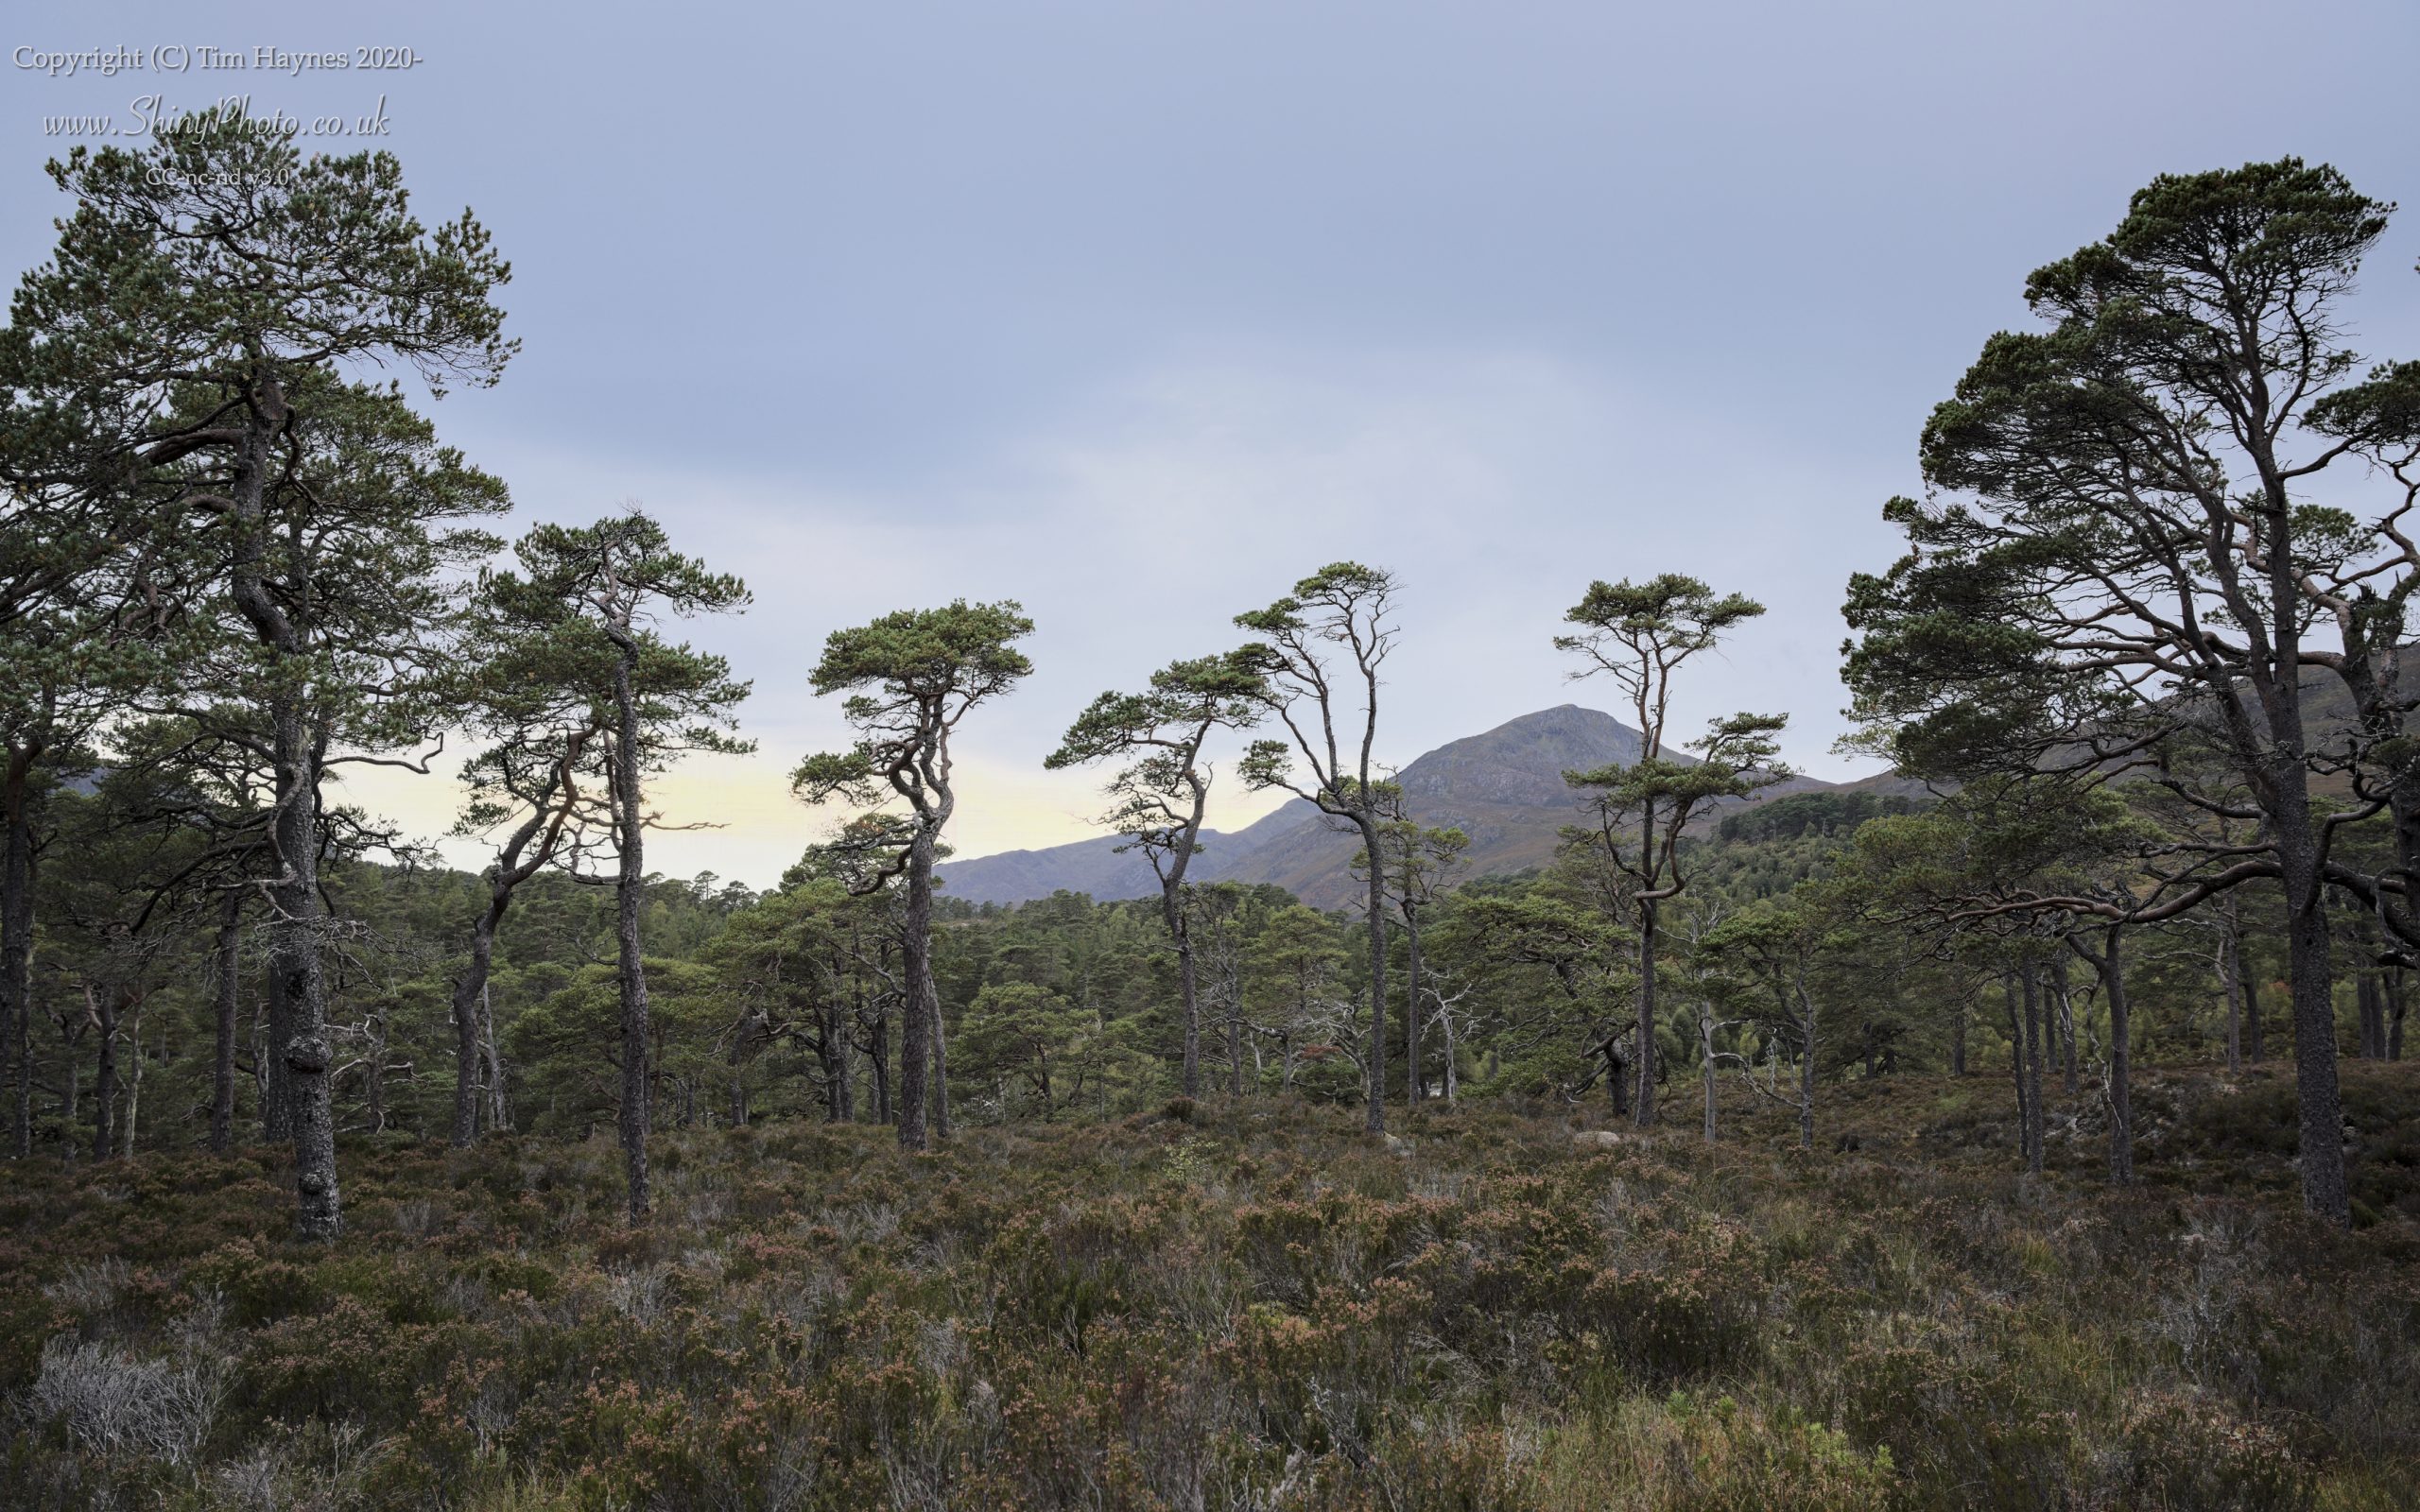

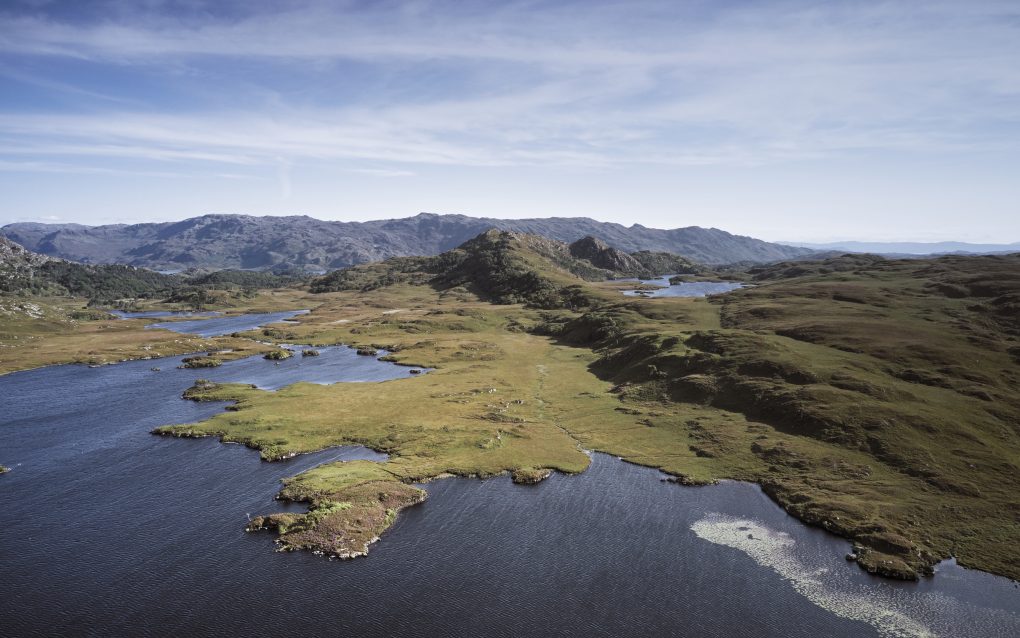
I also flew the drone around a bit. Lovely light, getting a better overview of the extent and distribution of the Caledonian Forest, river, mountains and haze into the distance.


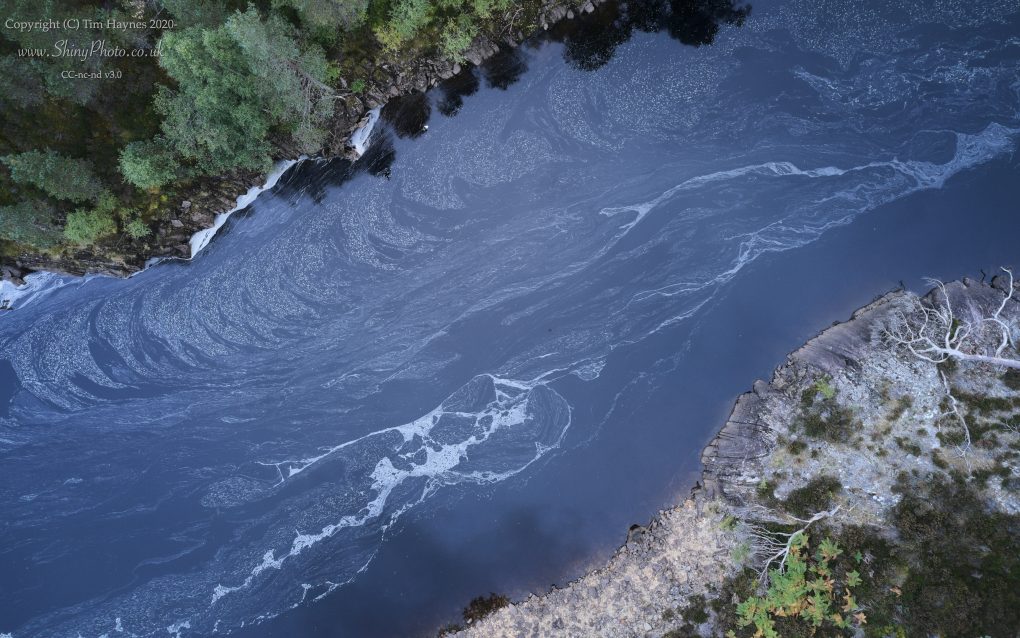
Some years ago, I had visited the glen in the middle of winter, with temperatures a degree either side of freezing, thawing slightly as the morning progressed. I was struck by a pattern of foam flecks on the water – particularly with a fine layer of ice just millimeters below the surface, over which the foam flowed. It moved so slowly, an abstract pattern messing with my eyes trying to work out how it moved. And I was surprised, because a couple of hundred yards upstream, the river had just travelled over a couple of waterfall cascades – so where did all the energy go? With a little thought, the river changes from wide yet rapid to deep and slower, with a yet deeper central channel in a V-shape.
This time, I flew the drone over the same mouth of the river, looking straight down onto the surface. This perspective makes the patterns of the foam all the more apparent – not just a difference between the central streak flowing faster, but a semi-regular pattern in the pattern against the far bank – indicating submerged boulders.
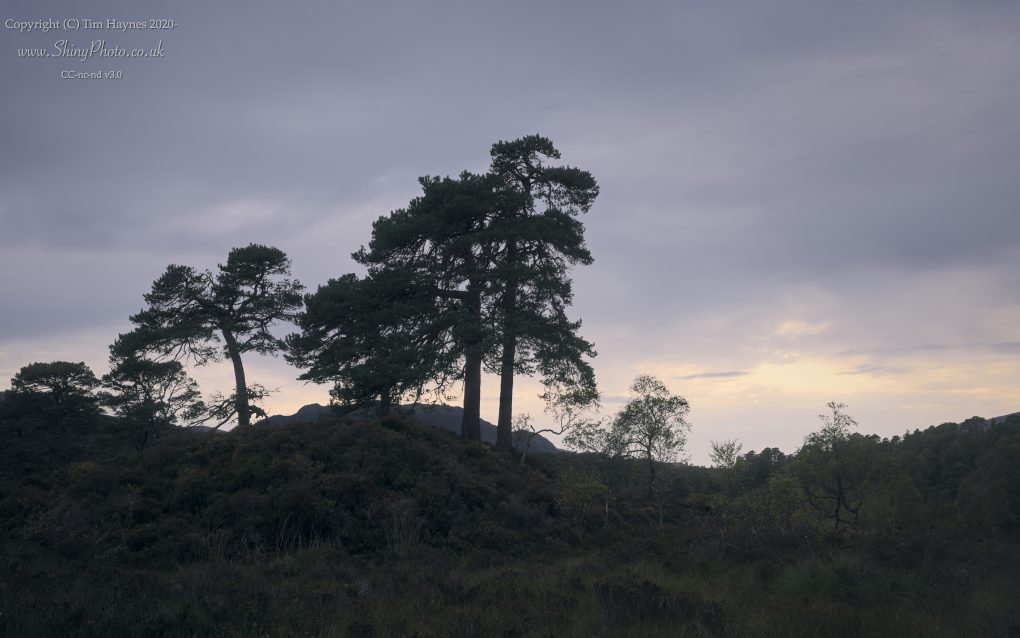
Unlike previous years’ visits, where I gravitate toward early mornings, this time I had arrived late in the afternoon, with just enough time to fit in a stroll before the light faded.
The light faded.
My favourite trees looked really rather pleasant in softer light, part-silhouetted against the sunset:
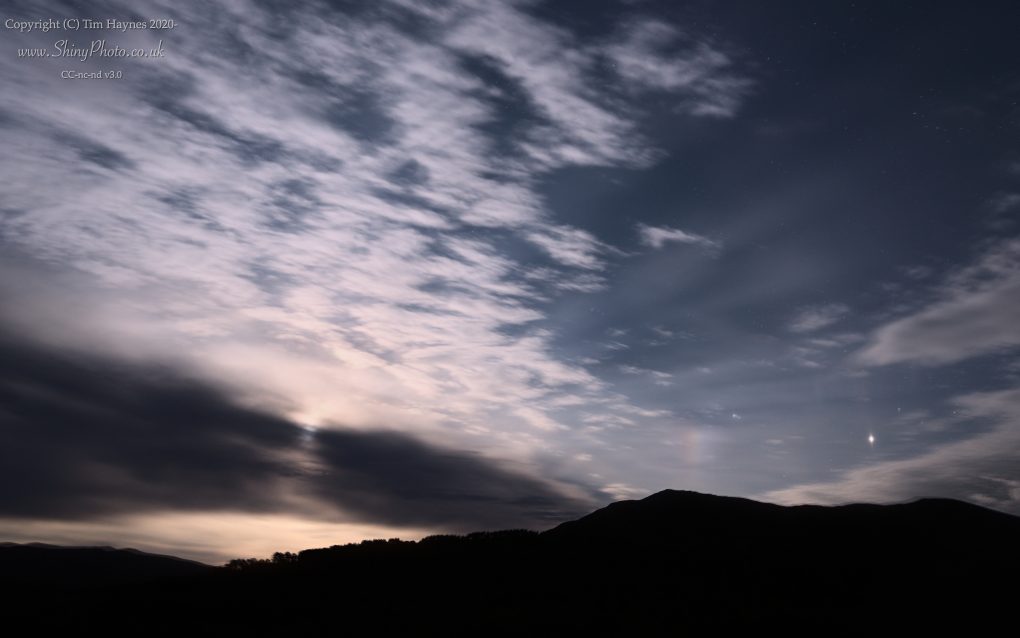
Then, in conventional fashion, night fell. I’d never been up at the Nice Place to watch that happen before, but it was magical. I stood at the famous viewpoint near the memorial, watching the clouds skimming overhead from the north as the moon rose – with Jupiter and Saturn nearby, and noticed a moon-dog aka paraselene – the first time I’ve seen such a thing, an analogue with a sun-dog during the day.
Finally, with night thoroughly underway, I made a photo of the well-known view looking along the length of Loch Affric toward the mountains of Kintail in the west – the landscape bathed in moonlight, all cool blue with the barest hints of structure and even less colour in the otherwise reddy bracken.
Prints, masks, cards and other products based on images above and others, are available from my ShinyPhoto website: Glen Affric.

I’m comparatively fortunate that the coronavirus and covid-19 have not affected me or anyone I know directly. Having spent the last 15 years working from home, life has not changed as significantly as it has for others.
So, apart from staying home and doing nothing much, what’s a geek to do to contribute back?
First, contribute data. As often as I remember, I update the KCL/Zoe app to say I’m still alive.
Second, grid computing projects.
There’s a significant amount of computer power available and machines would otherwise spend their time idle. A couple of months before the coronavirus became known, I had already installed BOINC, perhaps the oldest and best-known grid-computing system. As the scale of the Covid-19 problem became more apparent, I discovered the Rosetta@Home project which has been working to predict structure of proteins involved in the disease.
For mobile devices, there is Vodafone’s DreamLab project which similarly uses one’s iphone/ipad/tablet’s downtime to perform computations hopefully to identify drugs to fight Covid-19.
Third, art.
This took a bit of thought, but recently RedBubble who I use for selling my photography added the option of selling masks alongside the usual prints, mugs, etc.
I wasn’t at all sure what to make of it. The idea of profiting off others’ health and necessity jarred with the idea of art being a luxury item. However, a friend pointed out that if face-masks are to become normalized in society, having interesting art designs on could make them more approachable. There’s also the bit where Redbubble match each mask bought with a donation to an appropriate charity. So, a net good thing then.
Inspiration struck and I spent much of the weekend designing an image to represent the coronavirus (using a fragment of its gene sequence as a background, naturally) and even rendering a little video from it, both using Povray, my favoured ray-tracing software from the late 1990s(!). Naturally I made the scene description and other sources available as open-source: the-lurgy (on github).
The “lurgy” design and a selection of other landscape images are available on redbubble as face-masks with a profit margin set to 0.
And of course work continues, producing more photos to go on my website, ShinyPhoto…
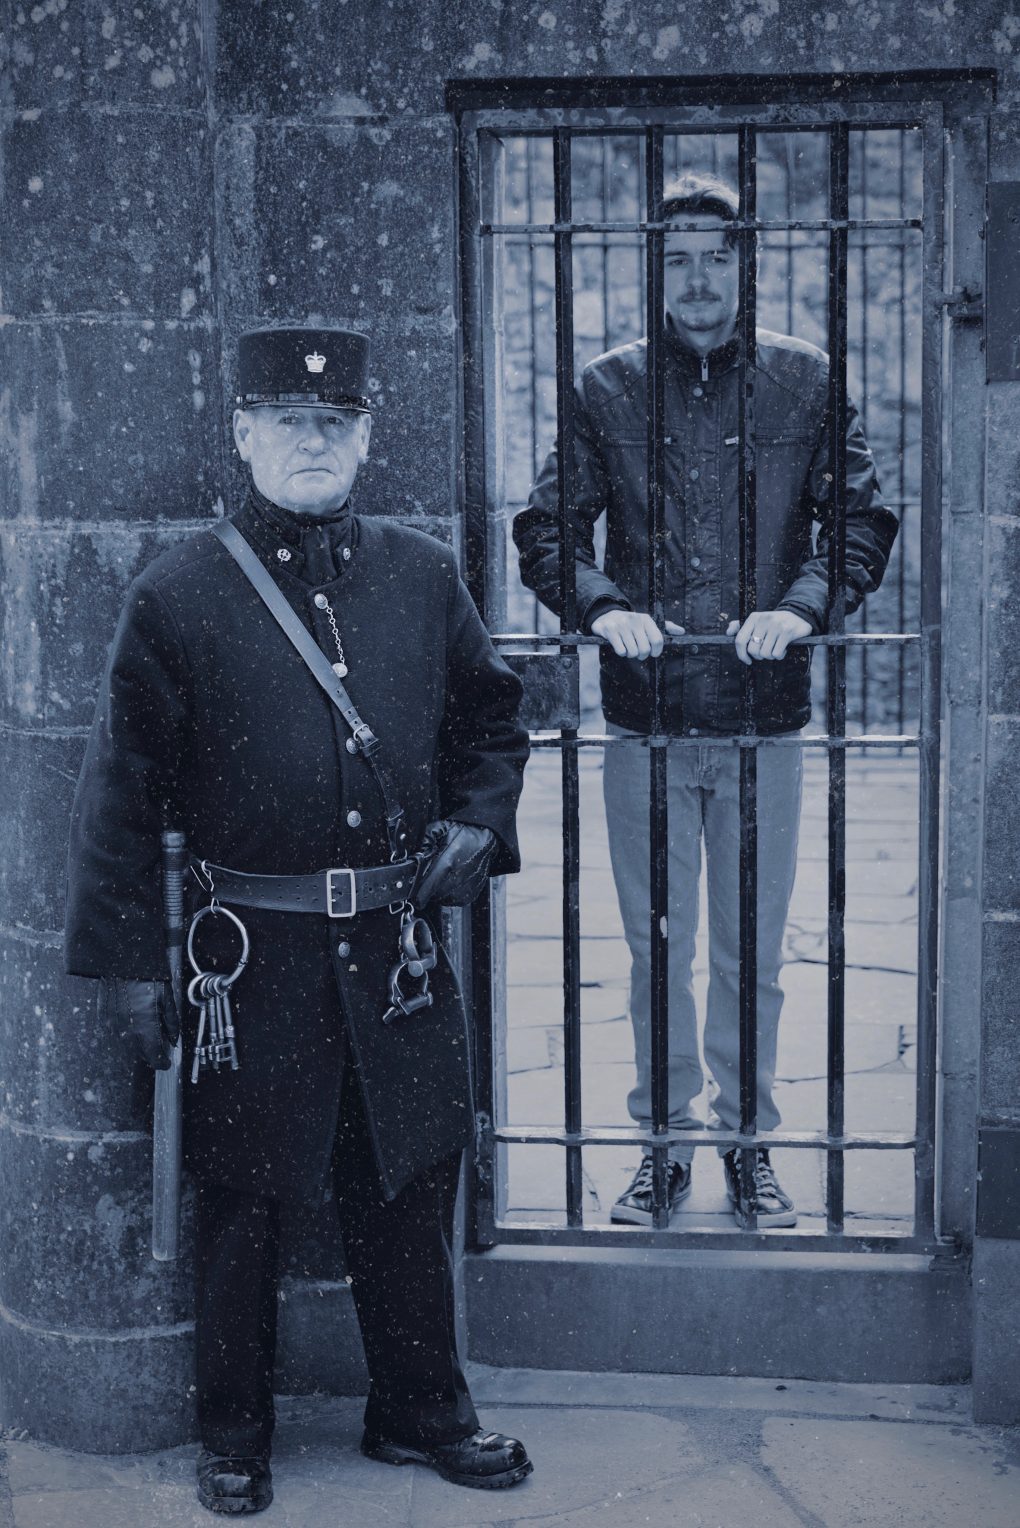
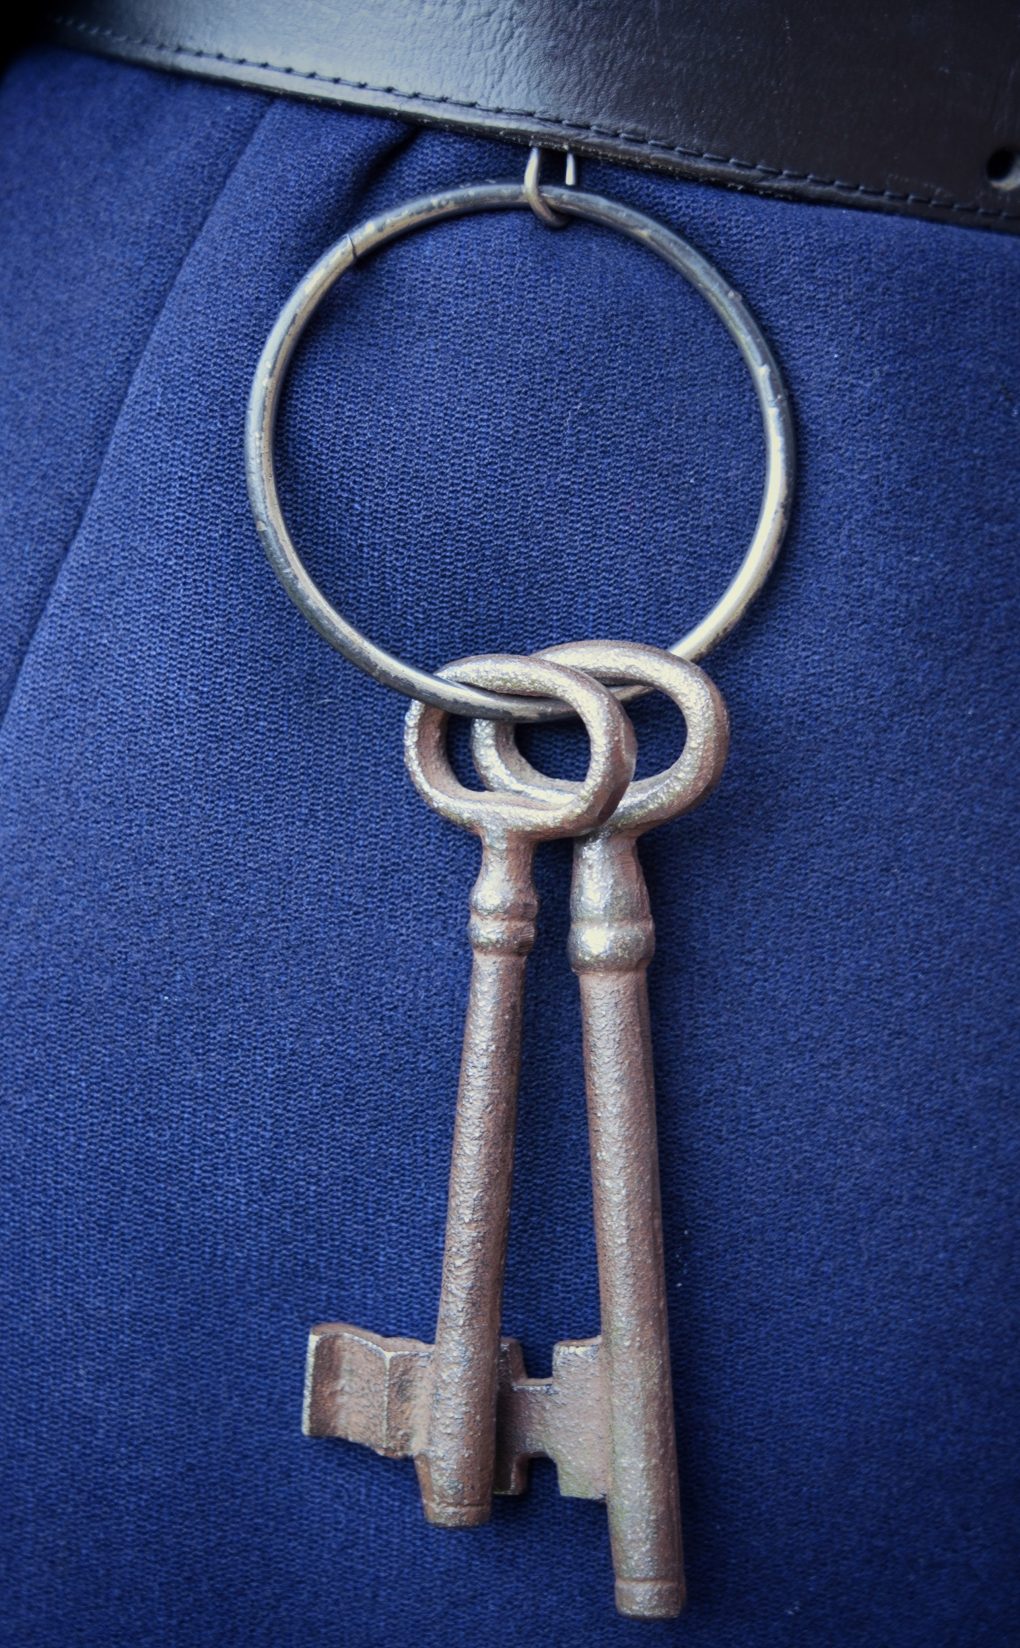
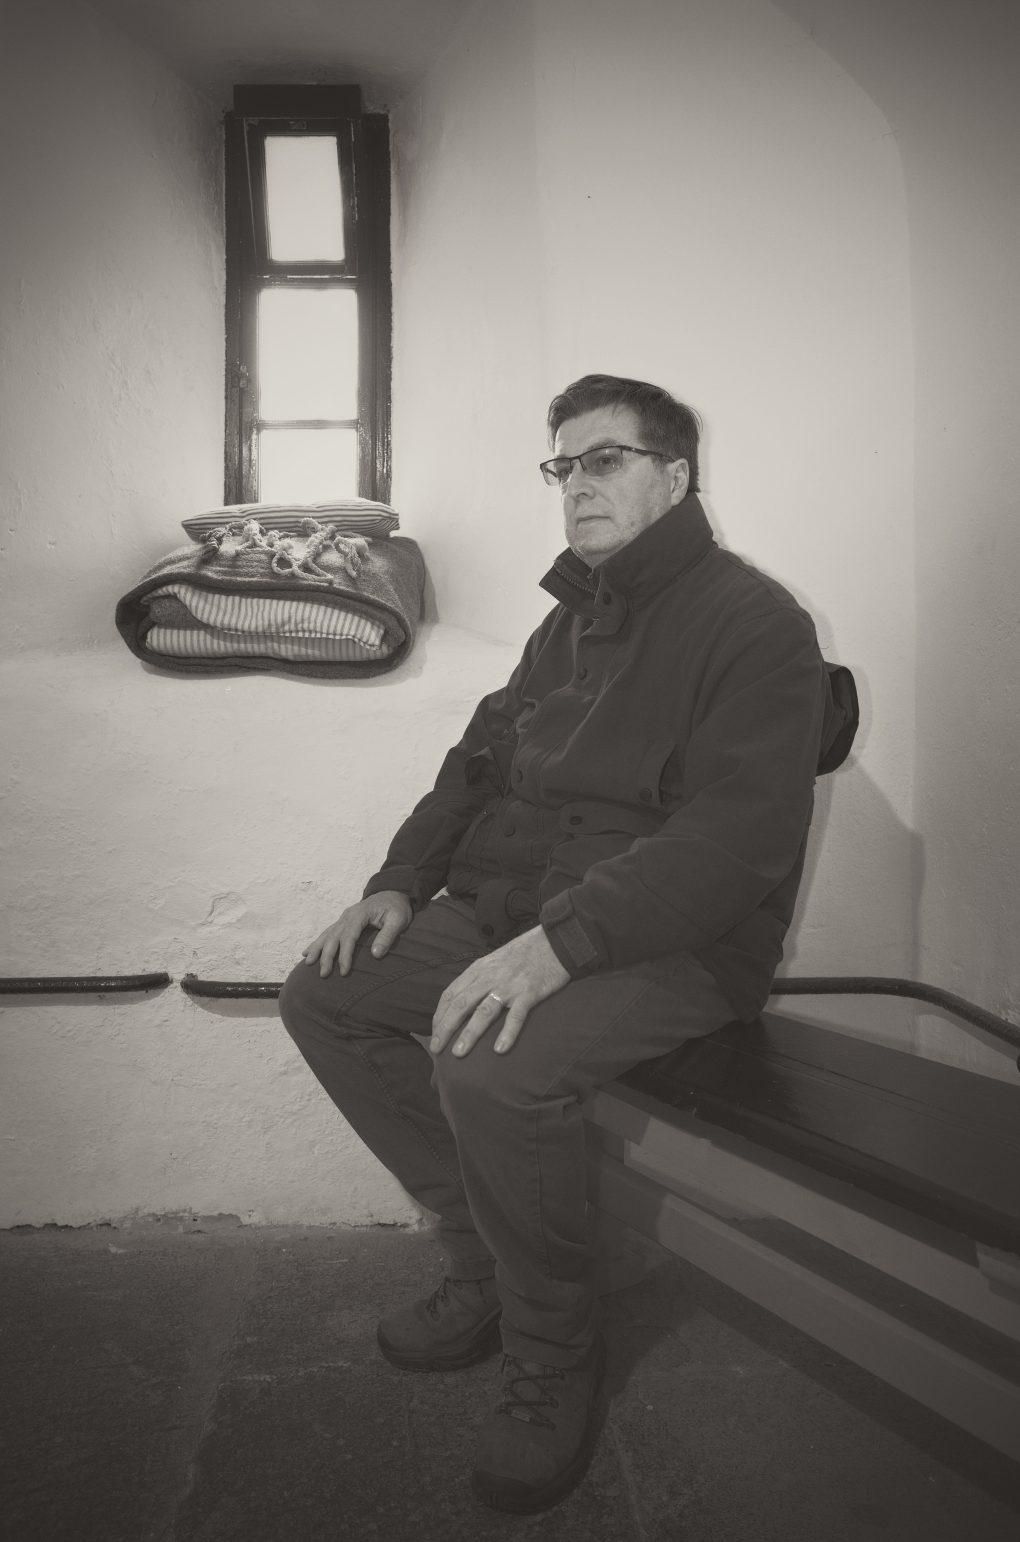
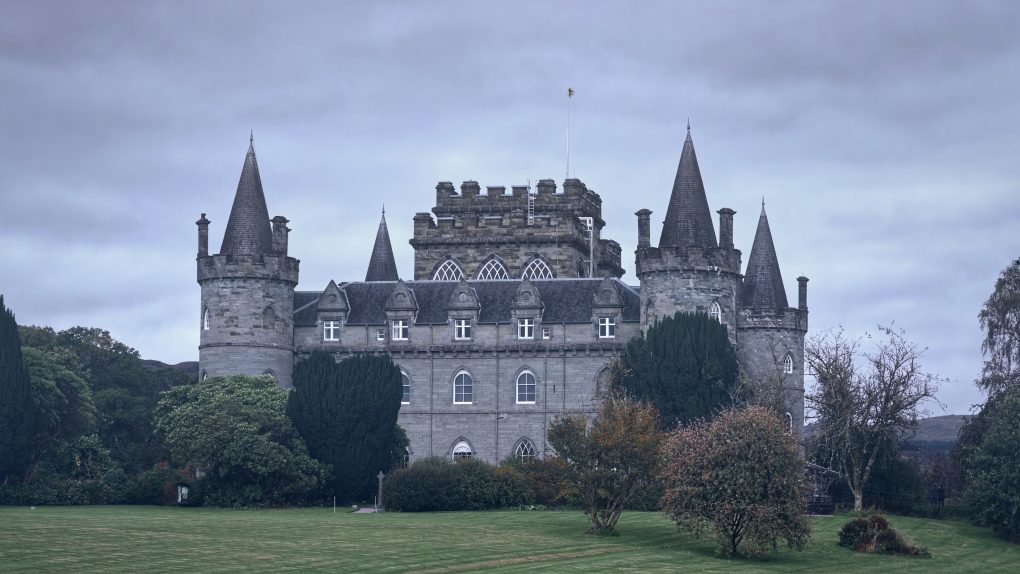
This past Saturday was the Word-wide Photo Walk; as has become an occasional habit, I attended the Inverary walk.
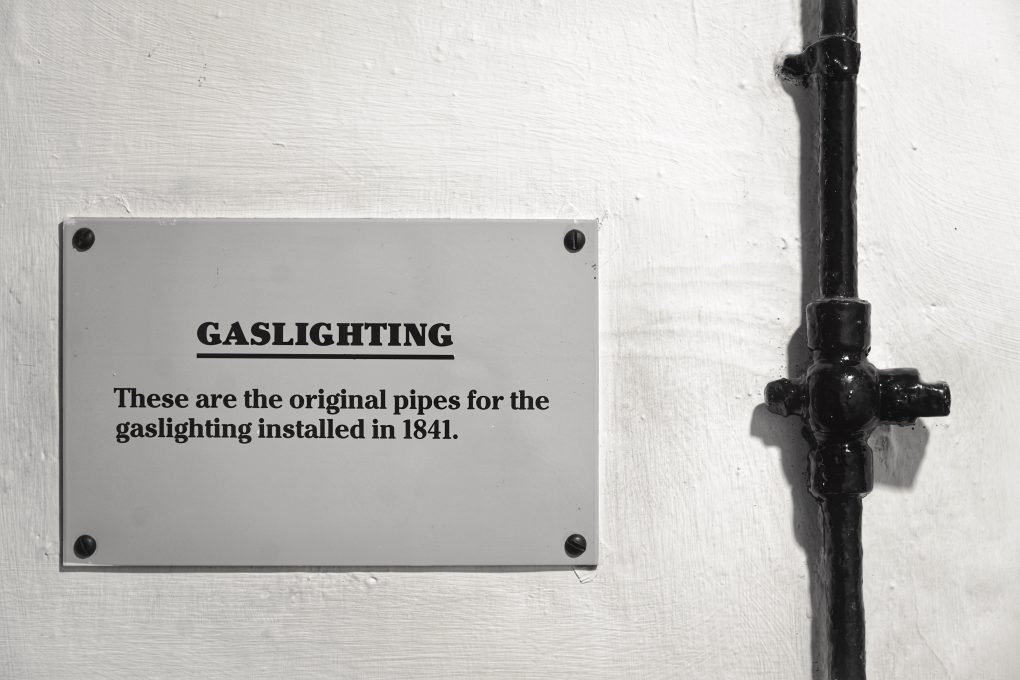
There was a trip around the Inverary Jail:


and around the town front and Castle:
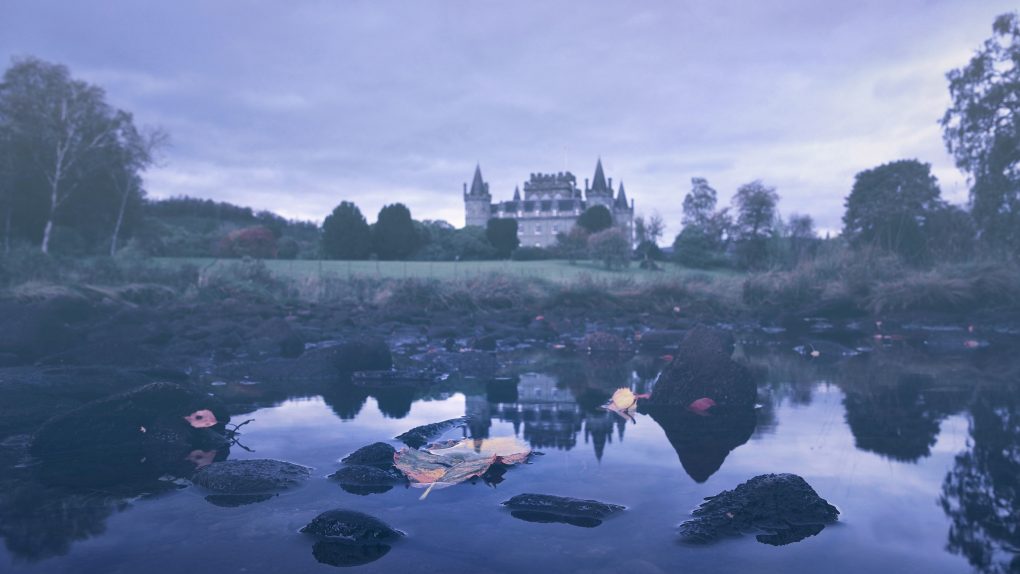
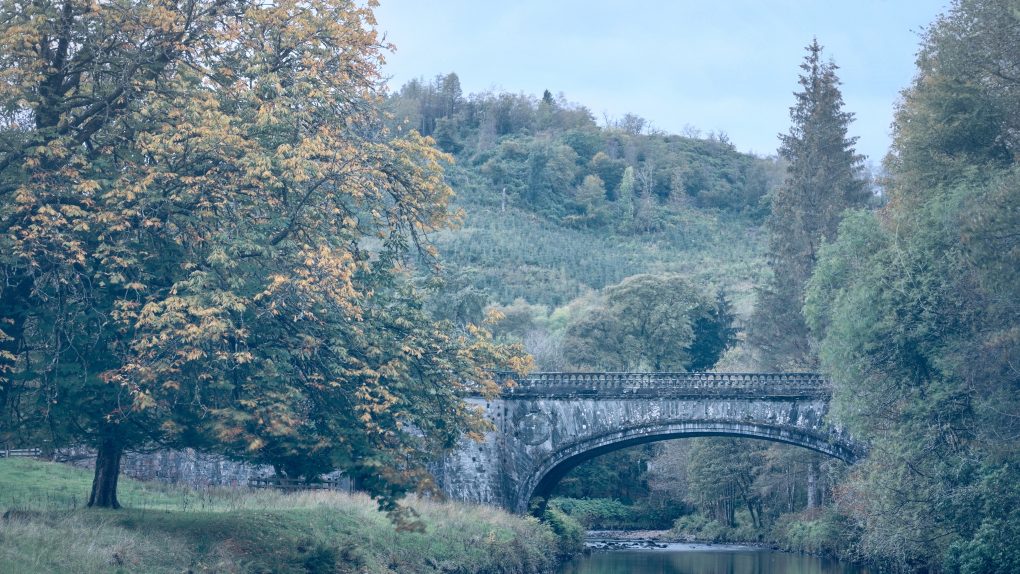
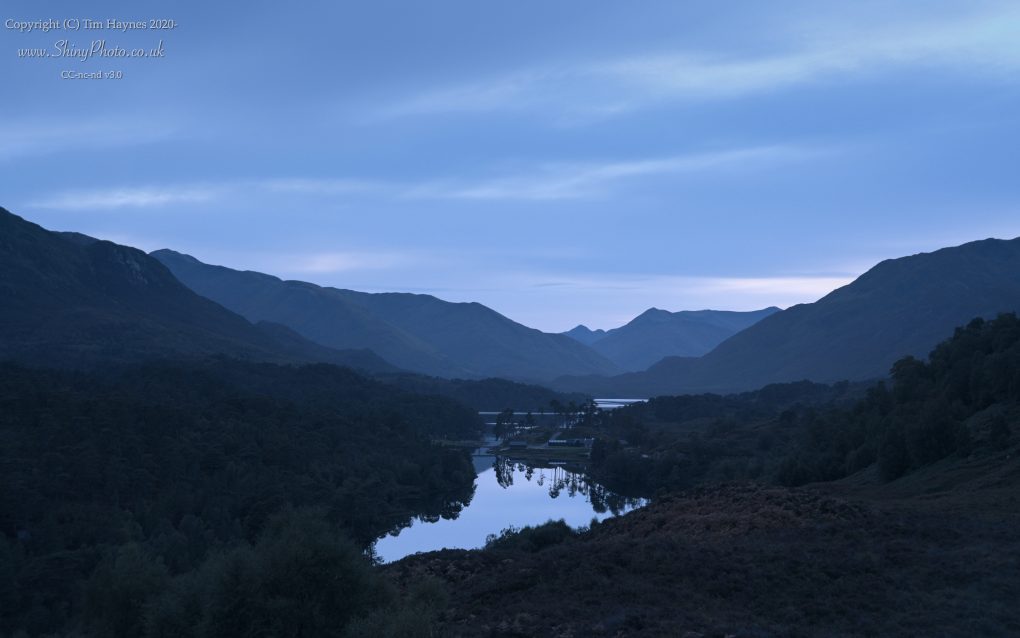
and early-autumn scenery around Dubh Loch:

Some of these are available as prints over on ShinyPhoto.